Welcome to the second week of the 2015 Ornament Exchange! I'm so excited to be bringing you over 70 bloggers that are sharing their ornament crafts or special ornament picks with you! It has been amazing to see all the wonderful ideas that have been shared so far and I hope you come back on November 14 to share your ornament tutorial on the 2015 Ornament Exchange Link Party!
The ornament exchange started on November 1 and ends on November 14. If you missed the first week, visit the 2015 Ornament Exchange page to see all of the participants and the links to their ornament posts. You'll find tons of great ornament tutorials and inspiration ranging from easy to advanced.
Today I'm sharing my ornament creation, along with my fellow ornament exchange buddies.
 My Pinterventures – Coastal Glitter Starfish
Inside the Fox Den – DIY Computer Parts Ornament
Simple. Pretty. Life – Cartoon to Classic Ornament
The House Down the Lane – Red and White DIY Ornament
The Chilly Dog – Clay Snowflake Ornaments
Coastal Glitter Starfish Ornaments
I created three Coastal Glitter Starfish Ornaments for Pam over at Home on the Corner. Pam gave me two themes, coastal or farmhouse, with the colors of turquoise, lime green, silver, or neutrals. While I love both themes, I decided to go with a coastal ornament because beachy ornaments remind me of my home state. Plus, who doesn't love being at the beach?
At first, I thought it would be so easy to create a coastal ornament, but I was soon overwhelmed by too many ideas. Should I go sand in a bottle, seashell angel, or felt sea creature? I can't even tell you how many coastal themed things ended up in my shopping basket...a lot! Ultimately, I decided to keep things simple and ended up with three plain starfish, twine, and some glitter (glitter makes everything better) to create Coastal Glitter Starfish Ornaments. Creating Coastal Glitter Starfish Ornaments was a great way to combine Pam's coastal theme with a little farmhouse. I could cover the starfish in cool coastal colored glitter and add a twine bow to give it a farmhouse touch. A win-win!
Fair warning before you start this project - You will be covered in glitter and will probably spread this glitter all over the house. I had to prepare dinner in the middle of my ornament crafting and I'm sure I seasoned it with glitter too. Glittered pork anyone? Okay, enough with the joking. Let's get to the crafting!
Supplies:
- Starfish
- Mod Podge (gloss)
- Paint brush
- Fine glitter (your choice of color)
- Hot glue gun/glue stick
- Fishing line
- Twine
- Paper x 4
Directions:
Step 1: To clean the starfish, dry brush off any dust.
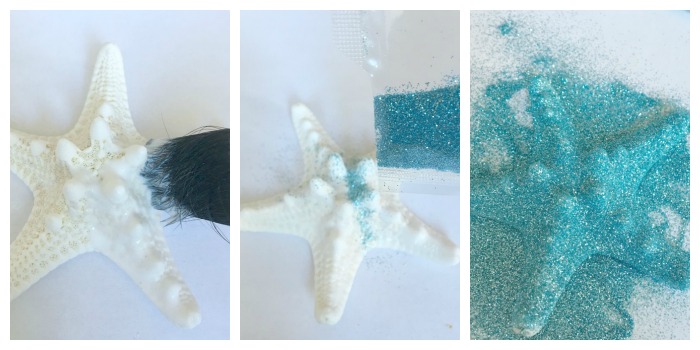
Step 2: In order to keep the glitter colors from mixing, use a single paper for each starfish and a separate paper to dry the glittered starfish. Paint Mod Podge onto the front of the starfish and sprinkle glitter onto the starfish. Let the Mod Podge completely dry - rushing this part can cause you to remove glitter.
Step 3: Depending on how long a hanging loop you like, knot together an 8 or 10 inch length of fishing line. Push the knot into the back of the starfish and pull up until it gets wedged in. Next, place a dab of hot glue on to help keep the loop in place. Let glue dry.
Step 4: Repeat step 2 to the back of the starfish. Touch up any spots that were missed by glitter and let dry. You may have to do several touch ups.
Step 6: Coat the entire ornament with Mod Podge to seal the glitter. Hang and let dry.
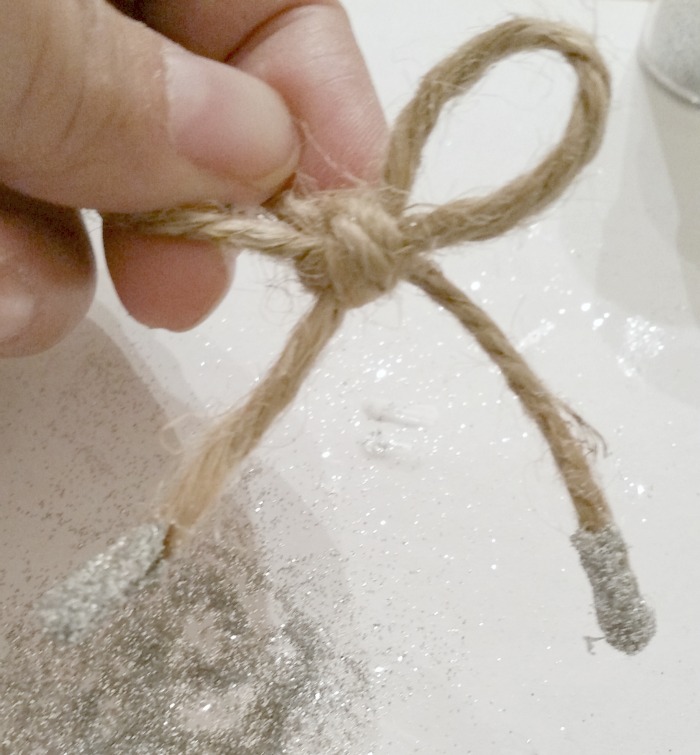
Step 7: Make a twine bow. Add Mod Podge to the tips and sprinkle glitter on it. Glue bow to the top of the starfish.
That's it! Super easy and gorgeous when it hits the light. Seriously, you'll be mesmerized at how much sparkle these have. My daughter actually wanted to keep these, but I told her these were for Pam. I guess I'll be headed back to the craft store for more starfish and glitter.


