I've seen these lil' sock snow people for years at craft shows and online but never had time to make any.
But this year I vowed to get some made for the upcoming holidays...and I'm a sucker for snowmen too!
I just don't like the ACTUAL cold snow stuff ;)
So there are lots of instructions online but thought I'd do a brief synopsis with tips on how I made mine for you all!
Best of all these cost me ZERO dollars to make...other than the bag of rice which was $4...I used old socks and supplies from my craft room!
*AND*
They are NO SEW folks...good news for me because I hate to sew LOL!
Ingredients for Snow People:
Crew Socks
Old/New Patterned Socks or old sweaters/shirts
Rubberbands
Scissors
Bag of Rice
Straight Pins
Buttons
Embellishments of your choice
**disclaimer: obvs these are NOT made to be toys for wee ones**
Crew Socks work best for the body of the snow people...I had a pack of crew socks that Riley deemed "too tight" (whatever that means) and it was just lingering in the closet because I'd never taken them back. So I snatched it right up for this project. If you are buying socks make SURE THE TOES ARE NOT COLORED...some socks have gray or yellow toes and that's not what you want if you end up using the toe for a hat!
Step #1: Cut the leg part off of the sock so the foot/toe is separate
Step 2: Turn the sock you cut off inside out and grab a rubber band and
twist it on the top part of the sock...as far up as you can manage. Then turn the sock out again so the rubber band is now inside the sock...got that?
TIP: I'm messy pouring rice and I didn't have any helpers so I poured my rice into
a slim glass, stuck the sock over it and flipped it over...NO MESS. You could also use a large funnel too. Because if you spill all that rice, well folks you got a big mess to clean up :)
Step 4: Fill that sock up with rice, smooshing it down each time till you get it filled out nicely. Remember you want the bottom to be nice, round & plump ;)
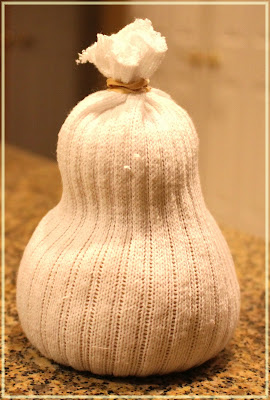
Step 5: So you end up with this...a gourd shape...squish the rice around to make the shape. Then use another rubberband to secure the top, again as close to the end as you can.
(Tip: I trimmed off the top after I rubberbanded it so it wasn't so much sticking up)
Step 6: Then take your 3rd rubberband and twist it around the center, creating the head and bottom of snowman. Don't worry about the rubberbands because you are gonna cover them up real soon!
TIP: Roll your sock when you're done with a lint-roller to clean off any fuzzies or strings.
And then you decorate them to your heart's desire---this is the FUN part!
It only took me 1 hour to make all 3 of these Snow People.
I used stick-on pearls for their eyes and noses...some I left off the noses just to be different.
But you could use straight pins with beads on the end just as easily.
The scarf here was made with parts of an old sock as well...I just cut a long piece off of a kneesock and tied it around his neck and trimmed the edges for a frayed look...super easy. I added a straight pin in the center of the scarf so it doesn't come off or untied but you could use glue too. The buttons were put on with fabric glue but you could sew them if you wanted...glue is easier though, just sayin' :)
Their caps were all made with other socks...I just cut off the toes of some old socks, rolled the edges and plopped them on their heads. I used white pom-poms to finish off the top of each hat..adhered with fabric glue. This one I added a holly cutout with a punch & some pearl berries from my crafty stash.
This one got a different scarf treatment and the cap is from a fuzzy old sock I had. But the scarf and hat trim were made from some leftover fabric I had and then I frayed the edges. Don't spend $$ on materials, look around your house for things that you can use...I have old flannel shirts, jeans, socks, etc that I store in a small bin and use for craft projects and its FREE!
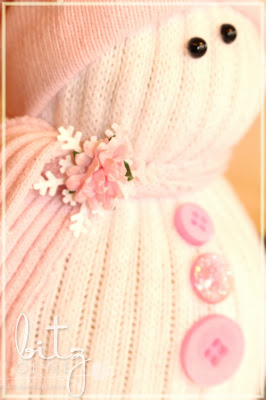
This lovely pink lady is my fave, I love the soft colors...her scarf and cap are made from an old sock as well. Then I punched a few snowflakes out of white cardstock, grabbed some paper flowers from my stash and glued them all on to embellish. I love the addition of the sparkly button and pom-pom on her cap too!
So now you know how to do it, its a quick and easy project...perfect to do with elementary school aged children too! Before you know it you can have a whole snow family made. Let your imagination run WILD with the possibilities! I'm gonna buy some cream socks to make more vintage snow people with some burlap and tea-dyed fabrics...will share those when I'm done!
Happy Crafting!
Suzanne


