Here's a really cheap and easy way to make a play shop for your little one.
This post contains affiliate links.
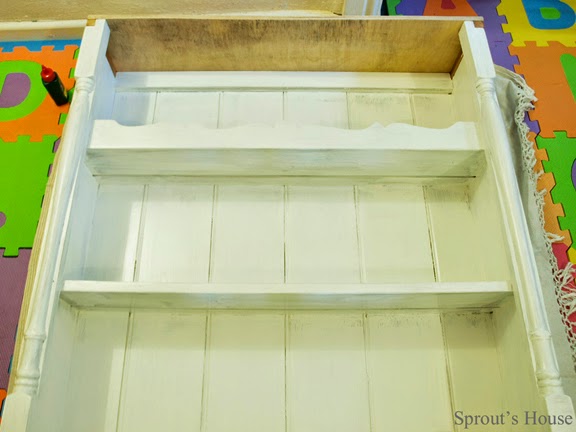
Sprout's Daddy and I purchased this set of shelves from eBay for about £15 - it was originally the top from a dresser.
The shelves came with these little pieces of wood that slotted into either side of the shelves to help them balance on the bottom half of a dresser.
We decided to turn the shelves upside down so that they would be more stable. Then we sanded and primed them using a gloss primer.
Once dry, Sprout's Daddy used an off cut of wood to add a top to the (upside down) shelves. He sawed off the ends of the shelf supports and used them to fill in the little gap underneath the new top. These were glued in place and then the off cut was glued and nailed to the top. The curly parts of the supports were glued to the front of shelves to hide the where we had attached the new top and make it look a bit prettier! All this was sanded and primed too.
The final job was to paint the shelves - I used Crown's Non Drip Gloss in Duck Egg Blue and gave it a couple of coats.
For the shop, we used a mixture of food packaging we had saved, some bits that Sprout's had received as presents and then we also bought a few bits and pieces too.
(In case you're interested, the grocery set (white rice, brown rice, sugar etc), food group baskets, till, scales, cupcakes and lollies are all from GLTC.)
Once everything was arranged on the shelves and Sprout officially opened the shop I decide that although the curly sections had prettied up the front it still looked a bit bare. So I made a simple banner.
Using Word, I chose a really simple font (easier to cut out!) and typed in the letters I wanted. I printed it out and cut out each letters. I chose some off cuts of fabric, drew around the letters and then cut them out. I glued each letter on to some ribbon and then stuck the ribbon to the shelves using mini glue dots from Hobbycraft.
Have you re-purposed a piece of furniture recently? Was it for you or for you children? Share your ideas in the comments.
Sprout’s House
xox


