Quantcast
Channel: Crafts - BlogHer Topic Feed - All Posts
Viewing all 1382 articles
Browse latest View live

In A Quilting Frenzy! Somebody Stop Me!

$
0
0
Recalculate pagebreaks: 
Recalculate pagebreaks

Not really. What I really mean is, "STAND OUTTA MY WAY!"

On a morning when I thought things would be back to normal after the holidays, I awakened to an e-mail from the Missouri Star Quilt Company. Now, every morning I check Jenny Doan's Daily Deal, but I wasn't expecting to find a BIG "2014 Kick Starter Sale."

1 Quilting Fenzy

Under the Daily Deal is that "2014 KICKSTARTER SALE" RED PRINT

(click on the image to go there)

OH MY GOODNESS! The 10" Tumbler Template, Tula Pink's "Acacia" Layer Cake," the "Starflakes and Glitter" Layer Cake for $20 (with those little figures I just LOVE, but couldn't bring myself to buy because it was Christmas Fabric), and one of my all time favorites, but never purchased, "Happy Tones" Layer Cake.

So here's what I did:

Screen shot 2014-01-06 at 8.20.36 AM

Printed off the 3 Layer Cakes, full size onto 81/2" x 11" paper. (Click on all images to enlarge.)


Three Fabrics

Played with the three sheets of paper to make sure the fabrics go together.


2 QF Happy Tones

"Happy Tones:" The Light


3 QF Snowflakes and glitter

"Starflakes and Glitter:" The Medium


4 QF Acacia Layer Cake

"Acacia:" The Dark and the "zip"


5 QF Tumbler

The coveted 10" Layer Cake Tumbler Ruler


6 QF Almost $100

ALMOST up to $100, so I grabbed a charm pack off the list.


7 QF $100.24

And here we have it! 5% Bonus Quilter's Cash Points, *FREE* shipping, a Tumbler Template, 3 Layers Cakes and 2 Charm Packs for $100.24.

I have outdone myself. My heart is beating so hard. It's time for a nap, But, before I go! If you want to make this quilt along with me, order the same or your choice of three layer cakes from Jenny's "2014 Kickstarter Sale" page and we'll all quilt together for our first "Quilt with Me" quilt along.

See what you think. I can't wait to see how many SunbonnetSmartsters are as nutty as I am.

And, if you want to order, JUMP IN as Missouri Star runs out of their popular specials quite often!

Thanks for reading along. You all are the ones that make my quilting SO MUCH FUN!


Toddler Painting: $6 worth of materials for $60 worth of FUN!

$
0
0

I think this is going to be another crafty week, because darn if I haven’t been feeling like a crafting QUEEN lately.

As most of you know, I was home for 16 days STRAIGHT for a sweet combo of work being closed (yay for working at a university) and a couple vacation days. SIXTEEN DAYS in a ROW. That’s kind of a lot.

And no, I’m not complaining because I loved having time off to hang out with Jack and Ollie. And yoga pants. And Christmas cookies. But mostly Jack and Ollie.

Keeping Jack entertained for that much time really forced me to be a little crafty, which is why I decided to do two different painting projects while I was home. The first project was from this month’s Citrus Lane box – it was supposed to be a handprint project, but turned more into abstract art. And I totally love it and hung it on my ‘Jack projects’ wall!

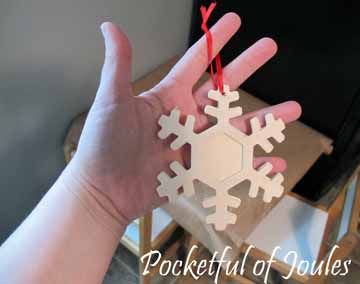
Our second painting project was inspired by some wooden snowflakes on clearance at JoAnn’s.

snowflake project - bare snowflake

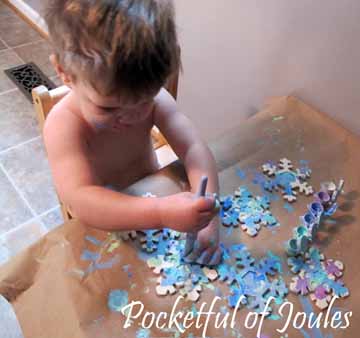
The snowflakes were on clearance for 50% off, which brought them to just $ .70 each. I also picked up a cheap paint pots kit for $1.50 and used some paintbrushes I already had at home. Then, I covered Jack’s little table with some kraft paper and stripped him down for some painting fun.

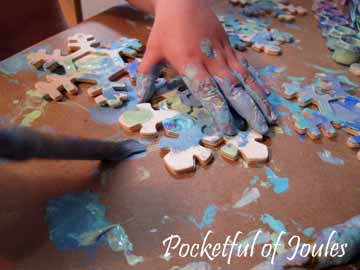
snowflake project - painting

snowflake project - painting close up

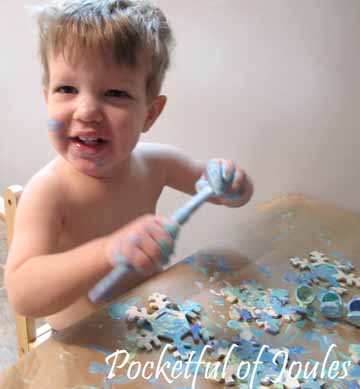
snowflake project - happy jack

And it was SO MUCH FUN! I can’t believe how long Jack concentrated on painting the snowflakes… and believe me, doing anything for more than 15 minutes with a kid this age is impressive! When he was finished, I just threw the paper away and stuck Jack directly into a bath (the paint washed off easily).

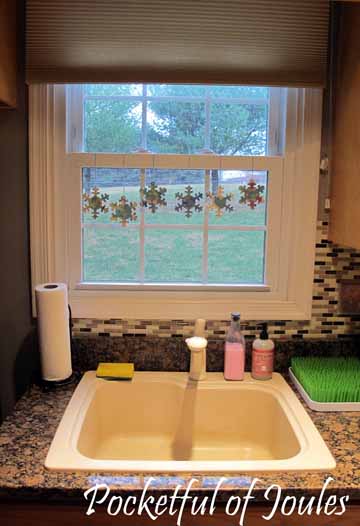
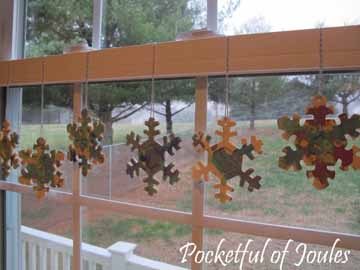
Once the snowflakes dried, I stuck some thread through the holes and hung them up in my kitchen window. I also wrote the date on the back of one of the snowflakes so that 10 years down the road I remember when we made them.

snowflake project - finished

snowflake project - finished close up

I really like my happy little snowflakes because they’re not “Christmassy” but more “wintery” so I can keep them up for the next couple months. This is especially nice since we took all our Christmas decorations down over the weekend and I’m totally going through withdrawal.

Do you have a super cheap and fun craft project for toddlers that I should try? Feel free to leave me a link below! Also, are you suffering from Christmas decorations withdrawal too? I kind of wanted to leave my tree up for another month…

MINNESNOWTA DOESNT DISAPPOINT

$
0
0
Recalculate pagebreaks: 
Recalculate pagebreaks

well its been cold! i mean really freaking cold. school has been cancelled, no one wants to leave the house, and josh keeps getting called off work. (he works outside)

it makes for some fun family time, lots of movies, and some impromptu dance parties. sid actually does have school today which will be good for all parties involved i am sure, (talk about cabin fever!!!) we can see the bottom of our craft bin and if i have to scrape glue stick glue off my dining room table one more time i might just have to pull my hair out!

we spent last week at our auntie cheryls house quilting and playing. i was able to finish a quilt for my very impatient 6 year old...since i came home from quilt retreat with this one for prudence he has been on me about finishing one for him. considering prudence's was a team effort i am very proud to say that i ALMOST did this by myself!! it turned out great and it has me jazzed to finish one for the little.

MINNESNOWTA DOESNT DISAPPOINTMINNESNOWTA DOESNT DISAPPOINTMINNESNOWTA DOESNT DISAPPOINT

hoping the temperature rises tomorrow, cause while i love my hubs...8 hours away from each other a day does our relationship good!

A Toddler Pillow to Make EVERYONE Happy!

$
0
0
Recalculate pagebreaks: 
Recalculate pagebreaks

Today is part two in my mini-craftinista* series and it starts with a little story…

Have you heard of sleep regression? Apparently it’s a wonderful time in a child’s life where after months of going right to sleep and sleeping through the night, suddenly they don’t like to sleep anymore.

For Jack, this happened a few weeks ago – after sleeping like a champ we had to coax him into bed with a tiring combination of reading, rocking, milk in a sippie cup, snuggling with mommy, snugging with daddy and some more rocking. He even ended up in bed with us for a couple nights, only to be kicked out when he kept KICKING ME in the back all night long. I mean, I’ll take that crap from an 8 pound rescue dog… but NOT a 30 pound little man!

It was exhausting.

Which is funny because JACK was exhausted and just would NOT go to sleep.

So in a fit of brilliance (or just overtired madness) I told Jack that I had a SPECIAL pillow only for Big Boys to use. This SPECIAL pillow would go into his crib, but ONLY if he was a Big Boy who would lay down on it and go to sleep.

Can you believe that this worked?

Suddenly Jack stopped fighting sleep and would go right into his crib to lie on his special Big Boy pillow.

I’m a genius. A parenting genius.

Send your checks today to get your very own SPECIAL Big Boy pillow. Also available in Big Girl…

Just kidding. The secret is that I grabbed the closest pillow I could find, which was an old accent pillow that I had made for our couch ages ago. After living on the couch for a while, it somehow ended up in Jack’s room on his rocking chair. It was so well-worn that it’s quite flat… which makes it perfect for Jack since he can’t smother himself on it.

After Jack slept on it contently for a couple weeks, I figured I should make a pillow case for it so that I can keep it clean. So I grabbed an old pillowcase that we’ve probably used for 10 years or so and made it fit:

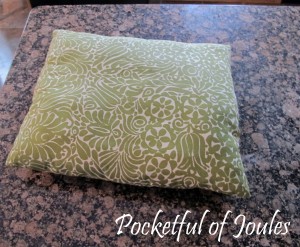
Toddler-pillow-before-updated

Check this out… it’s a magical pillow. Which is actually just a pillow I made a bunch of years ago from an old pillow case from Crate & Barrel.

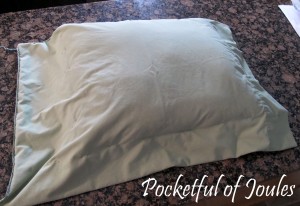
First, I stuck the throw pillow in our old pillowcase and pinned around it with straight pins. I pulled it in and out a couple times to make sure that it wasn't too snug.

First, I stuck the throw pillow in our old pillowcase and pinned around it with straight pins. I pulled it in and out a couple times to make sure that it wasn’t too snug.

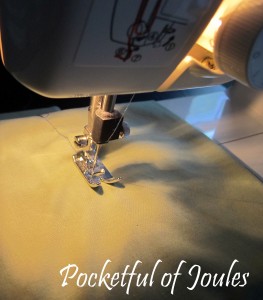
I then removed the throw from the case and stitched around all three sides, removing the pins as I went so that I wouldn't stab myself and yell out bad words.

I then removed the throw from the case and stitched around all three sides, removing the pins as I went so that I wouldn’t stab myself and yell out bad words.

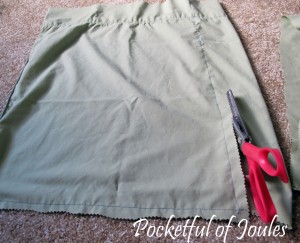
Once I finished sewing, I cut off the extra fabric. You can use normal scissors or be all fancy like me with my pinking shears. Is it weird that I have no idea how pinking shears came to live in my house?

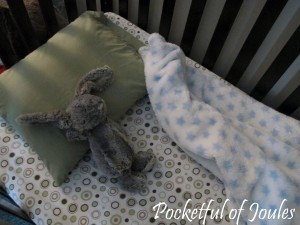
The finished magical SPECIAL Big Boy pillow. Mr. Bunny Rabbit approves.

Super cute, right?! And basically free.

And the best part is that I can sleep again!

* If TJ Maxx can call someone a Maxxinista… I can certainly call myself a craftinista!

Baby, It's Cold Outside

$
0
0
Recalculate pagebreaks: 
Recalculate pagebreaks

One of my favorite threads on Ravelry is the free paid patterns alert in the Knitpicks Stashdown group. Links are posted to patterns that are normally for sale, but are free for a limited time.  Recently, the designer Elizabeth Roggasch made an amazing offer, giving away all of her patterns for free.  I hadn't seen them before, but I fell in love with a lot of them.  The designer has a lot of adorable baby hats, so the offer was also particularly well-timed, as friends of ours welcomed a baby last week (actually, a few sets of friends welcomed new babies -- I'm excited for our daughter to have some playmates).

Since mom and dad didn't want to know what sex their baby would be before birth, I tried to pick a gender neutral hat.  Because it gets pretty cold here in the winter (especially this week!), I thought it would be cute if it was something that reflected that chill.  Therefore, I chose the Little Bucket Bear Hat, but modified it to look like a polar bear hat.


I used white Cascade 220 Superwash and black KnitPicks Stroll Glimmer (held double except in the snout, because I didn't want to break into another ball of yarn).  I improvised the eyes and snout using half-double crochet in the round.  The inner ears are also smaller than the inner ears in the pattern.

I hope mom, dad, and baby love it.  I think it's really cute, and I'm pretty proud of myself for my first crochet project that required counting and sizing!

Valentine's Day Paper Heart Leis

$
0
0
Recalculate pagebreaks: 
Recalculate pagebreaks


I'm such a sucker for Valentine's Day.  It's my favorite holiday, maybe even more than Christmas or Halloween.  I love that we have a day set aside every year to celebrate the existence of love in the universe.  All those pink hearts and cupids and flowers and giving little gifts to loved ones-- I love it!


This Paper Heart Lei is a simple project using tissue paper, drinking straws, and string.  Little ones will develop fine motor skills while cutting and lacing, practice patterning, and engage in creative expression during this activity.  These are perfect for kiddos to make to wear at a Valentine's Party!


Materials Needed:


  • Yarn or Craft String
  • Tissue Paper
  • Plastic Drinking Straws
  • Children's Scissors
  • Hole-punch


Children can snip the plastic straws into smaller pieces.  This is terrific cutting practice and it makes a nice crunching sound!


Prepare tissue paper hearts for the kiddos & punch holes in the centers for stringing.


Children will alternate between stringing straw bits and tissue paper hearts to make a pattern.


Voila!  A Paper Heart Lei!  


 Please leave a comment, I'd love to hear from you!

Megan Strong

www.teachinglittlelearners.com

How to Make a Minion Pinata

$
0
0

I was NOT wanting to do a Despicable Me party so I was seriously trying to talk my son out of a Despicable Me Theme birthday party because I could not think of any ideas for decorations except a million minions!!! However when I finally sat to plan out my party details with my handy Party Planning Printable I was able to come up with many, many Despicable Me ideas and can’t wait to make them all and show them off!


What you Need:

- Cardboard box

- Packaging tape

- Bungee

- Yellow, White and Blue Tissue paper

- Black Plastic Tablecloth


All of these items can be found at Dollar Tree for $4 total. The cardboard box you can ask if they have any boxes they are getting rid off. You can find boxes at gas stations. Any medium size box will do.


How to Make:

The Base of a Minion Pinata.

1. Take your cardboard box and cut the side so it will lay flat. Go from one side and roll it into a tight overlapping circle. Unroll and do the same from the other end.

Step 1 Minion Pinata

2. Tape your box at desired width both inside and outside.

step 2 Minion Pinata - despicable Me

3. Secure the bottom by taping it down inside and outside.

Step 3 - Minion Pinata for despicable me

4. Curve the tops of the box and tape into place leaving an area so you can fill it with pinata goodies. I used plastic baggies about halfway added the goodies and then added more plastic bags to the top and help shaped the head area.

Step 4 Minion Pinata - Despicable Me

5. Close off the top by adding the bungee looped thru a piece of cardboard and attached using tape. Make sure to completely secure the loop.

step 5 Minion Pinata

To Decorate the Minion Pinata.

6. Take white tissue paper and cover the entire Pinata and tape it down. This helps allow the yellow to pop out. Otherwise the yellow will look brownish from the cardboard.

Step 6 minion pinata

7. Take the yellow tissue paper and wrap the pinata. I used double sided tape to secure it all down.

Step 7 - minion pinata for despicable me

8. Cut the Blue tissue paper to make it look like a pair of overalls. Include the straps. Secure it on the pinata with tape.

Step 8 minion pinata

9. Cut a black strip from the plastic tablecloth to fit around the head area for the glasses band. Secure with tape. Cut a halfway U shape out of the black plastic table cloth for the mouth and adhere it to the pinata.

steps 9 10 minion pinata

10. Take some cardboard 3/4 in with by 10 -12 inches long and make 2 circles and tape together. These are the goggles. Cover them with grey or silver tissue paper or duck tape.

11. Next cut out 2 cardboard circles that fit just inside your goggles and cover those with white tissue paper.

step 11 minion pinata

12. Cut a slightly smaller set of circles from the cardboard, these can remain brown.

Step 12 13 minion pinata

13. Cut a set of circles from either black cardstock, construction paper of the black plastic tablecloth. These are the eyes.

14. Put your eyes together the white is the base, then brown and then black. Adjust them accordingly to your desired look.

step 14 minion pinata

15. Add the blue pocket to the front of the overalls. Use a piece of cardboard and cut out your pocket shape. I added a few pieces of the plastic table clothe and taped it down. The add the blue over the pocket shape and tape down. Take a blue marker and make your stitches marks, you can also use yellow but it may not show up very well. Adhere the pocket to the pinata. Did you notice mine is upside down!!! I have changed it for the final picture!!!

Step 15 minion pinatat

16. Add buttons to your overalls. You can use real buttons if you have them. I cut out a set of cardboard circles and covered them with black plastic table cloth and secured them with tape to the pinata.

step 16 minion pinata

That is it! You are done!

The total cost for me was FREE having done several theme parties, I already had everything on hand, I save colored tissue paper, plastic table cloths, and any paper to reuse for future parties. The only thing I am constantly buying is packaging tape!!!!

Sharpie Paper Dolls!

$
0
0

Sharpie Paper Dolls!

IMG_8814

Miki Tiki & Lucy!

I used a little fastener to connect a pink “ask Miki” paper-wheel to answer questions (almost like one of those “Magic 8-Balls”). You can turn the pink disc of paper while you are asking Miki Tiki a question, and she will give you one of 4 answers.  Lucy wears a red spider dress and NEVER has to comb her hair! Cool!

Captain and I had a lot of fun this afternoon creating paper dolls. It was turning cold outside, and we found that this entertained us for over an hour! All you need is a set of colorful Sharpies, some pieces of sturdy white paper (such as watercolor paper), and scissors. You’ll need a little fastener if you want to add an “answer wheel” to your doll.

Sketch your doll in a simple way, using a pencil. A very simple doll can be drawn by making a large triangle for the body, adding a circle for the head, and then throwing some on some arms and legs, if desired. I like to outline everything in black whereas Captain likes to keep it pure. You can add details, like eyes and hair with pencil, or free-form them in with the sharpies.

IMG_8817Color all parts of your doll and cut out. The Sharpies add luscious color that fills in the spaces in a way that I love!

IMG_8802

IMG_8821

IMG_8822

The orange, pointy head just needed something, so I cut a disk of paper, colored it pink and used a little brass fastener to attach it behind Miki’s forehead. Then I added 4 “answers” to the pink wheel for random questions. I didn’t put a lot of thought into it, but used as answers: “Go with your heart”, “Try something new!”, “Try again”, and “Ask the trees!” We took turns asking questions, with Dad, for a surprising length of time.  It was pretty funny when Captain asked the question: “Shouldn’t I snuggle up and watch a movie now?” and Miki Tiki’s answer was “Ask the trees!” Of course the trees thought it was an excellent idea and also added that we should have spaghetti for dinner.  That Miki Tiki… she is FULL of great ideas! :)

IMG_8806

IMG_8805

So many things can be drawn and colored with Sharpies, and wintertime is a great time to add in some extra free-form craft time! We will probably make more paper dolls again soon since we had so much fun. Captain suggested we keep a folder of all of the paper dolls we make this winter. I hope you try them too. Definitely consider making a paper-wheel-answer doll! It is more fun that it sounds, and the possibilities are endless….

A scrumptious winter week to all!

Karen

#winterfun #sharpie #paperdolls #diy

Homeschooling mom on the loose, creator of natural body products, writer

Kartwheels Homeschooling & Kid's Projects


Project: Paint Trim White {Phase One}

$
0
0

Painting Trim Supplies

I don’t think you can necessarily tell from this photo… But we have started a project in the new house! A very large and long project…

Painting Trim White Phase 1

I’ll be honest, I was getting a little bit stir crazy and needed something to do besides empty boxes and feel confused on where to put things and make things messier than they were when I started. I needed a project that I could see the progress of and then live with the change.

When we first walked through this house I saw a lot of brown. I love brown, like a deep dark walnut brown, but the brown in our house was not dark walnut. So, I mentioned to Mike that I’d love to have white trim and he kinda gave me wide eyes… “You want to paint all the trim in this house white?!?” were his first thoughts. Ok, it’s a lot. Ok, it’s daunting. Ok, it’s not just the trim but the doors and the cabinets and literally everything made out of wood in this whole house. But yes, I wanted to paint the trim in our brand new home white.

On Thursday morning I got the go ahead from the Mr.

On Thursday afternoon I took some paint swatches from Home Depot and held them against our trim.

On Thursday evening I caulked around all the baseboards in the 3rd bedroom. There was a very slim little gap between the wall and the boards. If I was going to paint all the trim in this house white I was going to do it right.

After the caulking I taped the walls real good and lightly sanded and wiped down all my surfaces.

On Thursday night I put my first coat of primer on the brown and I felt extremely exhausted (and also extremely accomplished)

Painting Trim White Doors Before & AfterAt this point we are absolutely in love with the final product and I’m not sick of painting yet. There was a moment on Saturday that I sat down for too long and wasn’t sure if I was going to get back up (ever), but I’m not sure if that was paint related or really sore from yoga class related. Either way we’re jazzed about the new state of our guest bedroom and cannot wait to tackle our family room downstairs. That'll be next.

Love, KJ

To see more before and afters visit thejaderstons.com 

Suck it, Pinterest

$
0
0

OR: (Not So) Fun Winter Activities For You and Your Toddler

I am currently participating in a research I did not sign up for on the effects of long term home confinement with a toddler on mom’s psyche. Despite the research’s ongoingness, the results are already in and they are conclusive: I cried twice today with my kids. The duration of the experiment is unknown and the end date was vaguely specified by One Year Old’s Pediatrician as “when he gets better”. My youngest is suffering from The Daycares, a condition which manifests itself in chronic cough and runny nose with sporadic and occasional outbursts of fever on the day you were planning to send him back to daycare. We’re going on week four.

In an attempt to make snot into snotenade I started searching the internet for something like this:

winteractivities3

I’m sure you’ve been exposed to some pinteresting suggestions on how to maximize your time at home with your toddler by creating adorable sock puppets from scratch or having cookie baking tournaments.

Time to get real, Pinterest. My toddler doesn’t posses the commitment level required for sitting. Sock puppets are SO not happening, which is why, based on four weeks of observation, I came up with an alternative list:

Not So Fun Activities Which Will Happen Whether You Like it or not When You’re at Home With Your Toddler and It’s -25º, So Suck it, Pinterest.

winteractivities4

1. Push “intercom” button on the phone repeatedly. Goal: The phone should never stop ringing.

2. Stand back and watch what happens when you spill the contents of your sippy cup on the floor. Goal: In the name of Science.

3. Drop the contents of IKEA coffee table drawer on the floor. Goal: Eat all of mama’s business cards.

4.  Climb on the window ledge and jump off to couch. Goal: Why should your brother have all the fun?

Dec-2013 229

5. Destroy brother’s change-pad-roofed-diaper-box-house/thinking spot. Goal: Why should your brother have any fun?

6. An empty hamper basket or toy box belongs on your head. Goal: Time to take running to the next level.

7. When being fed a bottle of milk in your room: Do NOT take it! Run in circles and if all else fails hide behind the curtain. Goal: You’ve seen the milk. You know where this is going. Don’t let that happen.

8. Empty the Kleenex box. Goal: Empty the Kleenex box.

9. Use your mouth to transport various objects around the house. Goal: At least one object has to end up in mama’s mouth.

10. Say “this” pointing at a different item each time. When mama hands it to you toss it. Advanced level: Toss it at mama. Goal: Therapeutic.

Bonus 11:

drawer

***

What sorts of (P)intersting activities are your toddlers/kids into?

Featured Artisan ~ Adore By Nat

$
0
0

Tuesday's Featured Artist is Adore By Nat.
From the On Fire Team.

Meet the Artistadorebynat

I love custom orders! Most of my orders are custom orders. Let’s plan and create one party package for your special one. I love custom orders! Most of my orders are custom orders. Let’s plan and create one party package for your special one.

adorebynat

Adore by Nat


Featured Artisan

Adore by Nat is this weeks Featured Artisan. You will find quality handmade party decorations for any occasion. http://www.artfire.com/ext/shop/studio/adorebynat

Find Adore by Nat On: Artfire Blog Twitter Facebook PinterestAdore by Nat Artfire Shop

Dreamcatcher

$
0
0

Nothing motivates the creation of a poorly-made craft like the prospect of a good night’s sleep.

It’s 8:07 p.m., and my kids are eating a bedtime snack. The conversation goes something like this:

MOMMY: You have to stay in your own bed tonight, Lily. Daddy is pretty sick with a cold and we can’t have you coming in our bed again.

LILY: Well, can you at least put a sleeping bag down on the floor??!?

MOMMY: (*Sigh!*) Kiddo, you’re six years old…you need to be able to sleep in your own bed at night!

LILY: But last night there was a spider in my room!

MOMMY: But why were you even awake at 4 a.m. to SEE the spider in your room??

LILY: (Pouting) I get bad dreams…I need a dreamcatcher.

Moments later, I’ve sprung into action. I’m in the garage…rummaging around in the frigid recycling bin for a plastic lid (where the heck is the ricotta container from last week’s lasagne?). If the dreamcatcher works…if it makes her feel safe, thus preventing a middle-of-the-night wake-up call (*again!*) it’ll all be worth it.

Container lid located, washed and cut. I proceed to dig up some plastic string from the craft cupboard; our stuff might be a jumble, but at least I know exactly where to find it during these moments of dream catcher crisis!

I ask Lily to think up three things that she’s had bad dreams about; she comes up with: scary dinosaurs, vampires and zombies (she seems to have to think pretty darn hard to come up with vampires and zombies, but I let it go). We pick a different colour of string for each scary thing – red for dinos, yellow for vampires (she tells me it represents the garlic that repels them) and green for zombies (natch!).

Several frustrating minutes later, I have an ugly, tangled mass of string wrapped and taped around a piece of bendy red plastic. Perfect! I ceremoniously tie it up with a piece of gold Christmas ribbon, explaining that the good dreams will “slide down the sparkly ribbon, and sprinkle gently over her face in the night.” (Damn, I’m good!).

I can’t say this is totally off the top of my head…last year, Lily’s older sister studied Native culture and they made dreamcatchers as a project. I seem to recall Elissa’s dreamcatcher looking a lot better than this…but we’re closing in on 9 p.m. here, so this will have to do.

Miraculously, Elissa offers to help put Lily to bed – and tell her the full story of the dreamcatcher (hey…is it working its magic already??).

A few minutes later, I shoo Elissa to her own bed and snuggle in to say a final goodnight to Lily.

“Mommy, does the tooth fairy come to my room every night?” she asks, staring up at her new dreamcatcher.

“No sweetie – only when you’ve lost a tooth,” I reply, cuddling up to her.

“But Elissa says that all of the fairies will come into my room at night to take the bad dreams out of the dreamcatcher, so that means the tooth fairy would come, too.”

“Oh!” I say, clearly caught off guard. “I didn’t know about that part!” It seems the ability to extrapolate on the stuff of legends and dreams is being passed along quite nicely to my first-born child…perhaps we should compare notes next time we team up.

Moments later, Lily’s breathing deepens and her eyelids droop, as her dreamcatcher sways gently over her head. Sweet dreams, little one…sweet dreams.

www.themotherofadventure.com

2014 Craft & Hobby Association Show: It's Like If Willy Wonka Made Paper

$
0
0

Fashion Show
Vanna White emceeing the Lion Brand fashion show

Today is the close of the 2014 Craft and Hobby Association trade show, and, I confess, I had to cry uncle. After a couple of days of pounding the concrete and being overwhelmed with eye candy, I had to wrap things up. It was an exhausting embarrassment of riches.

CHA is where the craft manufacturers all get together in one giant convention center, pull out all the stops, bring out their newest and most exciting products, and introduce them to all the buyers, designers, and press that come out to gawk. It's four solid days of the most beautiful, innovative, and inspiring stuff you can imagine. It's like if Willy Wonka made paper.

Martha Stewart Screenprinting
Martha Stewart's Screenprint Stencils for Plaid Enterprises

You can always count on Martha to come up with something fabulous, and her screen-printing stencils don't disappoint. As easy to use at home as a regular old stencil, but with the intricate detail of a screen print, and in Martha's signature classic designs. Plaid offered a stenciled chalkboard as a make-and-take, so I got to try it out first hand. The stencils work beautifully.

Rupert and me
Me and Survivor's Rupert Boneham

Lots of celebrities came out to the show this year, including honorary tie dye spokesperson Rupert, from Survivor. He was teaching some tie dye skills in the Tulip I Love to Create booth, but whenever I saw him he just ended up dying the shirts himself. There were a lot of fans who wanted a Rupert original. I caught up with him as they were turning the lights out and he was still a cheerful good sport when all I could think about was how badly I wanted to take my shoes off.

Anthony Ryan thinks I'm hilarious

Another good sport was Anthony Ryan Auld from Project Runway, attending the show with Brother and demonstrating the new ScanNCut cutting system. He let me fawn all over him on behalf of my mother-in-law, and sent me home with a message just for her, so I think that means that I get all the daughter-in-law points ever.

Brother ScanNCut
Brother ScanNCut cutting system in action

But honestly, his delightful presence was kind of overkill. This machine was easily my favorite find of the show, and it's made everyone's best lists. It blew my mind. When I was getting a demonstration, they kept laughing at my enthusiasm -- but it was about all I could do to not drop down to my knees and worship like Wayne and Garth.

There are plenty of cutting systems on the market, but what makes this one so spectacular is that instead of buying special cartridges or being hooked up to your computer, the ScanNCut works by scanning the image you want to cut -- whether that's letters or cowboys or even a high-contrast photograph -- and converting that into a file it knows how to cut out. Anything you can draw, or print, or imagine, this machine can cut out of paper, vinyl, fabric, leather, cardboard...I'm sorry. I got a little misty-eyed again.

I've been a scrapbooker since the days when we had to buy a separate punch for every shape we had to cut out. The gal who owned an entire alphabet was the most popular gal at crop night. In my garage I still have a tackle box, well, a Martha Stewart "craft organizer" in the shape of a tackle box, stuffed with forgotten punches I bought thinking they were an investment. It's kind of ridiculous how much we have at our fingertips now.

Visit my YouTube channel for a special message from Rupert and Anthony Ryan, and to see more from CHA!

Do Your Kids' Party a Favor: Don't Do Goody Bags!

$
0
0
Party favors
 
I don’t know who came up with the idea to hand out goody bags at the end of kids’ birthday parties, but I kind of hate them. Well, I “hate their behavior.” Nah, I pretty much hate ‘em.
 
I know! Let’s hand out bags that never bio-degrade and probably choke birds or sea otters or something, and fill them with toys made from plastic so thin and brittle they break before the child gets to the car! Bonus points if they’re filled with bubbles or gummy candy!
 
Of course, I too have been guilty of buying disposable themed bags and plastic toys from Oriental Trading Co. or Diddam’s, because I felt it was expected, and that’s part of the problem. My friends have actually had kids ask, “Where’s my goody bag?” Kid, I just threw a big party and let you come, you oughtta be thanking ME right now.
 
Besides the sense of entitlement it teaches our kids, the toys aren’t even durable enough to donate to another family. Candy is just as bad. Zach has cupcakes every other week because of some classmate's birthday; he doesn’t need any more sugar; thank you very much.
 
It’s fine to offer a memento, but it’s really not necessary. Neither is bringing a gift. I love when families put “No gifts” on their invites. I’m going to do that for the kid’s birthday party this year. Zach’s earning an allowance now and can buy his own toys. Kaylee has more toys than she knows what to do with. Sometimes it’s nice just to make a homemade card, and if you must, you can always slip in a $3 or $5 gift card to Starbucks or Target.
 
But what if you really, really want to offer a party favor? Here are some great suggestions I got from readers
 
A craft or T-shirt
You can have the kids tie-dye a shirt, decorate a mug or tile, assemble a paper craft, or decorate cupcakes. It provides a fun activity during the party too!
 
One friend said she went to a party where her family got a Polaroid photo, taken at the party, to put into a frame they decorated there.
 
Cake toppers
I served cup cakes last year and put butterfly rings on some of them and rubber dinosaurs on others. The kids got to choose which favor they wanted, plus they got to take home one balloon.
 
Easy reader books or puzzles
Paperback easy reader books and puzzles can cost as little as $4 each, which is reasonable if you don’t have too many guests. You can also ask each family to bring a used book or a used puzzle, and do an exchange so every kid gets a “new to them” book or puzzle.
 
It can be nice to have a ritual to help the kids leave the party, but it doesn’t need to be elaborate, expensive, or fill each other’s houses with stuff none of us needs or wants. The best gift any of us can give is friendship and making time to get together.
 
What kinds of party favors do you give out?

The Dangers of DIY'ing

$
0
0

When doing any DIY project, there is always an inherent danger in using a table saw or a razor blade improperly,

Stitched up Thumb

or even using a large, unsecured pineapple that could hit you in the head and give you a concussion.

Williamsburg Apple Fan Holiday DecorationOr even this: fortunately, I realized I had dipped my paintbrush in my coffee before I took another sip. In my defense, the coffee and the paint were almost exactly the same color…

Paintbrush in Coffee CupBut recently, I came across this “Pin” for a collapsible spray painting tent made with PVC pipes and disposable clear plastic drop cloths from the DIY blog Makely School for Girls that gave me pause…

Makely Collapsible Spray TentWhat a great idea to be able to set up an enclosed area where you can spray, and then break it down and get it out of the way, right?! If you look closely at the tent, it is completely sealed on all sides, except for the double-draped opening.  Which is the intention, after all, to contain the spray to a confined area, but clearly you also have to be inside the sealed tent while spraying. Now, on this blog, called Makely School for Girls (so adorable!) the writer repeatedly cautions everyone about being properly protected from fumes and spray, encouraging, no, demanding that anyone who builds and uses this tent must wear proper protective clothing to cover her/him AND a respirator (NOT one of those little surgical masks either-we are talking the big mask with an air vent-like this 3M Tekk Protection Demolition one from Home Depot.

3M Respirator Mask @ Home Depot

(Imagine that $24.97is all it takes to keep you safe from harmful fumes!)  In this post, the blogger, Lindsay Ballard’s cautions:

“*****IMPORTANT!  I also need to say that you MUST wear a respirator when you are in the tent. MUST, MUST, MUST. If you go in there without one, I’ll drive to your house and give you a stern talking to.  And no, those little paper masks just won’t work.  You should ALWAYS use a respirator for your projects if there’s any chance that some harmful particles (paint, wood sand, metal etc) will be in the air.  Don’t make me hunt you down.  Because I will.  And I can be mean.  Not really, but seriously.  My granddaddy was a machinist and we are certain that the metal dust is what caused his lung disease. I also recommend wearing safety glasses (which you should be wearing anyway when you spray paint), nitrile/latex gloves and long sleeves/pants when you go in there (so you won’t be covered in a fine mist of paint yourself).”

Kudos to the author for stressing the importance of proper protection and educating us all about the dangers of spray painting in an enclosed space. BUT, I know, myself, (and I am sure that there are many, many more guilty DIY’ers out there), and I might just be tempted to jump in there and spray one little thing without being hazmatted up.

Cordova Defender Hazmat Suit Home Depot

Cordova Defender ll Microporous Suit from Home Depot

Because even now I sometimes just grab a can of spray adhesive or paint while working in my (essentially unvented) basement workshop and think, “oh, it’s just this little bit, It will be fine.” Well, its not, folks. Not in the least. These companies are putting the warnings on their products for a reason! Just for my own FYI, I grabbed a few of my favorite products that I use on a daily basis in my workshop and was astounded at the levels of toxicity present in so many cans and bottles of goop and spray and paints that I thought were completely safe!! Here are just a few samples- this one is from a little pot of latex paint. It contains Ethylene Glycol- the chemical they use to make anti-freeze & airplane de-icer . According to eHow:Ethylene Glycol is a colorless, odorless synthetic liquid substance used to make antifreeze and for de-icing airplanes and runways. Ethylene glycol breaks down in the body, producing poisons that can damage the brain, heart and kidneys. Even with medical treatment, swallowing antifreeze is often fatal. Read more:  http://www.ehow.com/about_5977662_polyethylene-glycol-vs_-ethylene-glycol.html#ixzz2qk8hoEFC.

 Paint Pot Warning Label

Now clearly, I am not going to drink the stuff, unless, of course I happen to dip my paintbrush in it by mistake. But, breathing in stuff can be just as harmful. This is from my favorite spray adhesive:

Spray Adhesive Warning LabelProbably not the best decision to have a portable space heater right next to my work table… This label is from a popular brand of chalk paint:

Chalk Paint Can WarningAnd this one is from a can of furniture refinisher that I like to use:

Furniture Refinisher LabelAnd this one from my “odorless mineral spirits” that I sometimes use to clean up brushes:

Mineral Spirits Label

And finally this bottle of a cleaner/degreaser that I got at a natural food store to transfer prints onto wood. I saw this on a DIY show where the host actually put her nose to the bottle and took a deep breath to illustrate how non-toxic and great-smelling and harmless this stuff was! Yikes!

Citrisolv CleanerI looked up some of the ingredients on the above labels and this one scared the crap out of me!! Toluene: Toluene is primarily used as an octane-boosting additive to gasoline. It is also used as a solvent in paints, household aerosols, adhesives, solvent-based cleaning agents, and synthetic fragrances.
Read more:  http://www.ehow.com/about_6530607_toluene-made_.html#ixzz2qk9mAbwC According to Wikipedia: “Inhalation of toluene in low to moderate levels can cause tiredness, confusion, weakness, drunken-type actions, memory loss, nausea, loss of appetite, and hearing and color vision loss. These symptoms usually disappear when exposure is stopped. Inhaling high levels of toluene in a short time may cause light-headedness, nausea, or sleepiness. It can also cause unconsciousness, and even death.” 
On top of that, I started thinking about all of the old furniture I have been working on, sanding and releasing particles into the air-that I am breathing in without a mask-that could very well be mold, old toxic chemicals and even lead paint. If you notice, all of the above labels contain warnings about making sure that your work area is properly ventilated, and the importance of wearing protective masks and clothing.

Dangers poisonSo, enough label reading, time for action! What’s a DIY’er to do if you don’t have a vented workshop or an outdoor space you can use year-round? Well, for myself, a few decisions have been made and are being implemented immediately. No more spray painting or sanding or gluing in the basement, PERIOD. Until spring, when I can set up shop outdoors again, (at which time I may entertain the idea of a collapsible painting tent ala the Makely School for Girls project, because that is AWESOME : ) I am temporarily going to roll up the oriental rug and move my workshop to our upstairs living room (which is quite lovely, but essentially gets used once a year, on Thanksgiving. Hopefully, by then I will be moved out of our house and into a nice, open studio or workshop.)

Living Room Fireplace PMThis parlor has high ceilings, 4 windows for ventilation and a fake fireplace for a little ambiance : ). Electric sanding will be done outdoors, regardless of the temperature, and masks and gloves on from now on! Just out of curiosity, where do all of you DIY’ers do your painting, sanding and staining? Do you have the luxury of a beautiful, vented and well-lit workshop? Do you have any suggestions on the best place to DIY? And, on that note, gotta head to Home Depot  to pick up my mask and gloves. I suggest, if you are planning on doing any future painting, gluing, sanding or staining DIY projects, that you do the same. Have a happy and non-toxic Sunday, everyone! Susan


http://countrydesignhome.com/2014/01/19/the-dangers-of-diy/


Craft Resolutions - Become a Jill of All Crafty Trades

$
0
0

I always bite off more resolutions than I can ever metaphorically chew.  The optimist in me says this is a good thing that it keeps me on my toes and always aiming high.  The pessimist in me says I am just destined for failure.  One resolution that I made last year and stuck with was to take a new class every month.  I learned everything from how to flood cookies with royal icing to pole dancing.  Each month was a new adventure and often times my friends joined in the fun.  This year I have the same goal, but I’m hoping to also take advantage of cheaper ways of learning – AKA the internet and friends.  Lucky for me BlogHer has a few things from my list to help me become the crafty Jill of all trades I aspire to be.


Credit:  Grow Creative


This year another goal is to try more art as opposed to crafting.  I want to try working with acrylics, pastels and watercolors.  My goal is not to be amazing at it, but to just become familiar with the mediums and techniques for working with them.  Last year I took two BYOB painting classes with my girlfriends.  Worth every penny and tons of fun.  This year I’m thinking of checking one of these goals off the list online.  Lucky for me I noticed that  Elise from Grow Creative is doing a series on learning to use watercolor.  I am even more inspired to get this watercolor party started.

Next --->


Credit: Craftiness is Not Optional


Another arty technique that has always blown my mind is stamp carving.  The whole reverse image thing, using sharp objects and excuses to start collecting pink erasers all peaks my curiosity.  While trolling the BlogHer network looking for inspiration I can across Meream from Bored and Crafty.  This lady is hardcore, she likes to carve a new stamp a day.  Over on Craftiness is Not Optional Jess has a full on tutorial for stamp carving.  Chevrons, hot air balloons, bows – oh my.  My greeting cards and art journaling just got kicked up a notch.

Next --->


Credit: Babble Dabble Do


Why should the kids have all the loom fun?  They can keep their rubber bands I am wanting to bring back the 70’s and make abstract yarn, leather, fabric and ceramic wall sculptures.  Mark my words, textiles on the wall (think macramé) is the next bit interior design trend.  I just stole a bunch from my mother that she made and now I’m totally inspired to make my own.  There are several blogs on BlogHer that have posts about weaving.  Rachell Oewens talks about stash busting via looming.  Thank you Patchwork Times for informing me that Craftsy has online weaving classes.  Though the project is for kids, I loved the inspiration of weaving with items from nature over on Ana from Babble Dabble Do.  Next stop, craft store for a loom.

Glitter Sh***er

$
0
0

So this prissy little lady occasionally shows up in my photos. She is impatient, cuddly, and high maintenance. So it only makes sense that she demands a pretty little place to do her business. 

First, I have to share my inspiration for this magical throne. While vacationing in Shreveport Louisiana, Joni and I came across the best slot machine I’ve ever seen.... “Kitty Glitter.” Afterpissing away my $20, it came to me. With my inconsolable desire to see glitter around the house, it only made sense. I had to get her to tap into her Kitty Glitter bad-self.

For this princess, I decided to go with a pale pink glitter. I found it at hobby Lobby and its called “soft pink”.

Our litter box has a lid, so I started with that. Take your mod podge and cover areas bit by bit. Shake on and dust off the glitter. Going piece by piece will allow you to keep even coverage and fill in any spots you may miss. 

A small bottle of glitter allowed me to almost cover the entire litter box. But since we have ours next to a big piece of furniture, I didn’t need to cover the whole thing. She loves it. And looks so dainty while tending to her womanly needs. Here's the completed project. Glittered in less than an hour!

$1 Mirror to SUPER Chic Decor!

$
0
0

You know that feeling when you’re at a garage sale, and you’re about to leave empty-handed, but then the people hosting the sale yell out, “I’ll let you have it for $1!” - that feeling? For me, this came on a day that I was admiring a large, albeit slightly water-damaged, mirror. Stacy will tell you, I’m always drawn to mirrors at garage sales. I’m not sure if it’s because they’re shiny or because I’m vain, but I just like them.

This means, of course, I’ve already purchased plenty of garage sale-chic mirrors for my apartment (just taking a quick visual inventory, I see two in this room alone). But $1? C’mon.

So I’m sitting at home, contemplating whether to paint or frame it when it hits me - break that sucka and make a mosaic mirror. Game on.

The supplies:

  • Mirror

  • Piece of wood in the size & shape you want

  • Paint (Go to Lowe’s/Home Depot and pick whatever your heart desires - then get a sample of it. They’re only like $3 and it’s more than enough paint!)

  • Paint brush and paint bowl/container

  • Safety goggles and leather gloves (Seriously - this is effing glass. Don’t mess around.)

  • Hammer

  • 2-3 old/scrap towels

  • Saran wrap

  • Tape

  • Liquid Nails glue (Gorilla glue or whatever)

“I hit with hammer NOW?” Wait! Let’s get the base ready first. Take your piece of wood and get to painting. Here’s mine after a few coats of paint.

Alt text

Make sure it’s good and dry before even starting on the mirror part.

I did some research and there are TONS of ways to crack a mirror. You may choose to opt for the duct tape method, the glass cutter method or something else, but I opted for a much more sophisticated method, only for the more advanced crafters: saran wrap and scotch tape. Put the saran wrap over the front part of the mirror and then tape to the back. I did just one layer, but I think it would have been better to use two. It should look like this.

Alt text

Alright, once the mirror is ready, lay it glass-side down on one of those towels. Place the other towel(s) over the back of the mirror, and get your safety goggles, gloves and hammer - it’s go time.

Alt text

Once you’ve suited up, the next step is to hit it with a hammer. Plain and simple. Just take a breath and hit it (I’m giving you a pep talk because I needed one myself before I had the gall to actually hit the mirror). Check the mirror in between hits to see what kind of breaks you’re getting. I’d recommend starting with a soft swing, just to gauge it, and then getting progressively harder as needed. Then break it to your preferred… break-itude.

Alt text

Excellent work. Bleeding yet? Hopefully not. Now start to gather the “best” pieces. This part is totally subjective, so just whichever ones you like. As you collect your faves, put them in a safe place where they won’t cut anyone.

Alt text

I know, I know. I can hear you all now. “What the - there are pieces of broken glass all over that girl’s living room and it’s going to take forever to arrange all those pieces so they look good!” (Both fair points, by the way.) But not to worry! That’s why we used the towels, and as for the arranging - it doesn’t take that long. In less than 30 minutes, I had turned that pile of glass into this.

Alt text

Hold your applause, we’re not done yet. Now it’s time to get the glue out. And if you’re like me, grab something cold and refreshing as well - we’re gonna be here a little while.

Read the rest on littlebitpretty.net!

8 DIY Valentines Day Crafts – Cards

$
0
0

This is a curation of Valentine Card Crafts I found around the web. Valentine’s Day homemade cards are meaningful and unique.  I just think these are some of the cutest ones out there! I hope you find some you want to make!


valentine-crafts-collage
READ MORE

DIY Jewelry Holder on the Cheap!

$
0
0

After showing you last week how to transform an old trunk into a bar, I realized that the extra wood "shelving" had to be used up. And simultaneously, I was struggling to keep all of my jewelry organized and easily accessible so that I can dress up my outfits a bit more regularly with something sparkly or pretty. So I had just the best of ideas. Just look at this tired old lady trying to do the trick. My jewelry was stacked and stacked and INACCESSIBLE!

So in the spirit of giving this old lady a rest, you'll first need to take a jewelry inventory, and get rid of all that you no longer want (Oh, I guess that means a trip to Goodwill and shopping for fun, new goodies. Damn, life is hard). Then lay out the keepers onto the board to be sure you have room to store it all. I LOVE bangles, so I really wanted to have enough space between the nails to hang them all, without them being cluttered. Again, my old lady just wasn’t cutting it anymore. Here's seriously how I went about measuring!


I made sure my bangles had room. Only four would fit so I used a ruler to mark four even spaces. Four nails would easily hold all of my bangles, so the second, third and fourth row of nails would be to hang earrings. I laid the nails out and marked where to nail them so I would get an even, finished look.

**Important note!! If you look closely, you'll see erased pencil markings! Remember to measure twice, nail once?!?!

Read more on littlebitpretty.net!

Viewing all 1382 articles
Browse latest View live