Quantcast
Channel: Crafts - BlogHer Topic Feed - All Posts
Viewing all 1382 articles
Browse latest View live

The Orange Soda Birdhouse ~ Yes, I Am Not Afraid of Random Creativity

$
0
0

Sounds ridiculously fun, no?

Well, my bird thinks it is!

Orange Soda Bird House
source: Raige Creations

She crawled in the soda box at the opening at the top, slid down, then stuck her head out the handle. I thought she might be stuck in there, but no, she was just having fun!
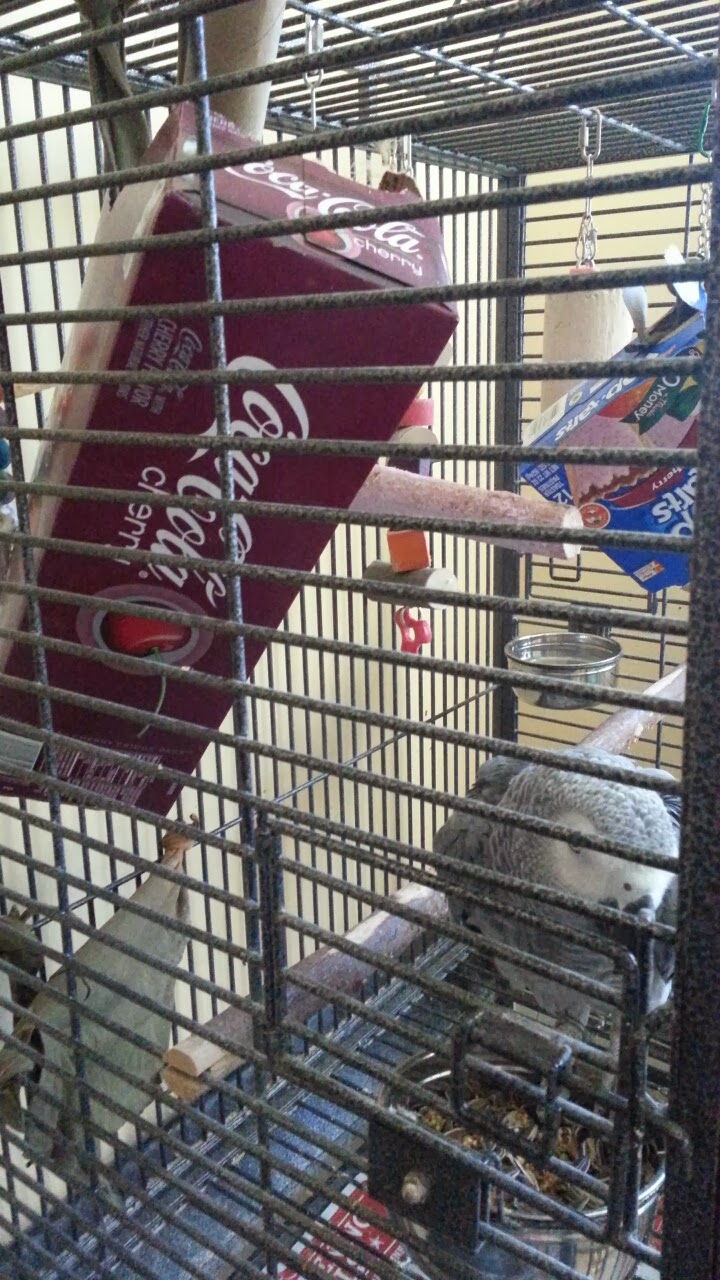
Dangling Boxes - Joy for the Birds
source: Raige Creations

Ever since I got lost on the internet that one day, and found I could MAKE bird toys, I have actually been making my own bird toys.

It started with the register paper rolls. I used up the ones I had, even bought more and used those up. 

Then I discovered I could use boxes and tee shirts. I got lots of ideas from here, and have since found this Pinterest board. I now recycle in a completely different, and fun, way.
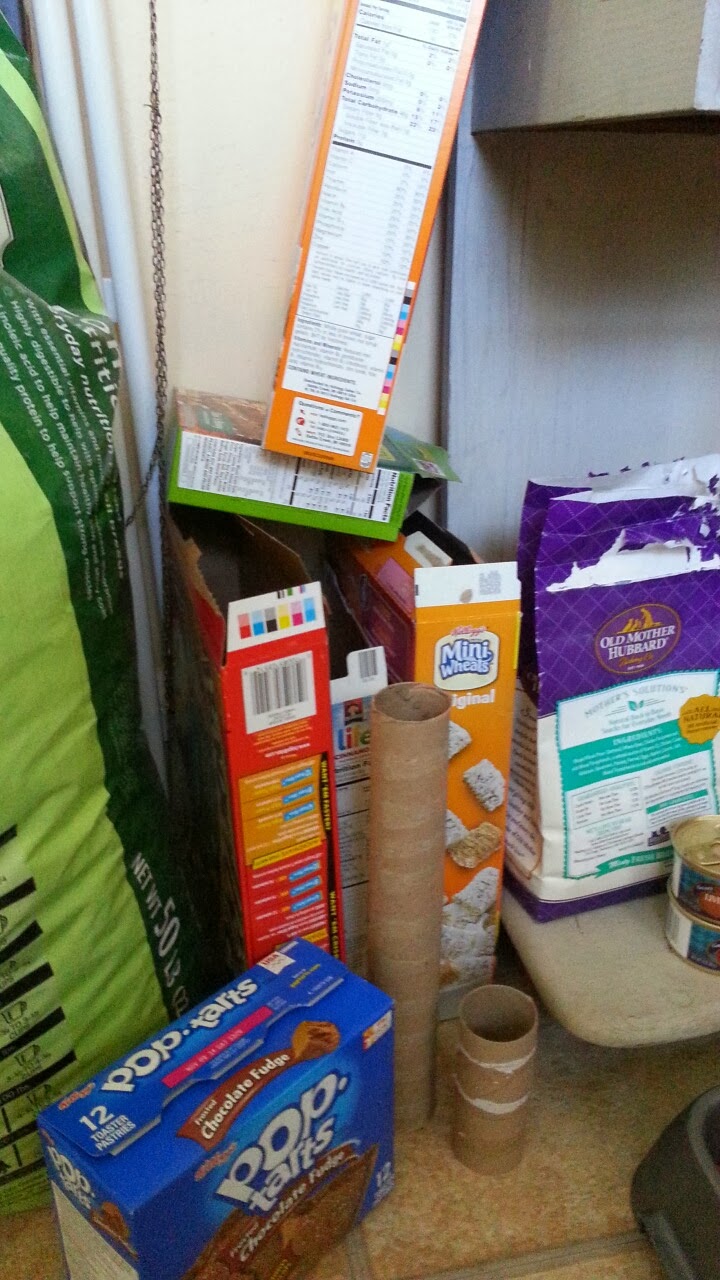
My mini recycling center
source: Raige Creations

I hoard boxes, paper towel cardboard rolls, toilet paper rolls, tee shirts, anything I think I can use. The area by the bird cages looks like a messy recycling center.

Not to mention I am saving a ton of money. Store bought bird toys for large birds run $10-$20 a pop! And they don't last very long at all. Looks don't matter to me, or the birds, so I just give them my basic no frills homemade toys. I don't paint them or try to be fancy. 

The birds just love tearing up boxes. It is a great way to keep them busy. Plus, I do believe it is helping our one parrots' tendency to pick at his neck. His feathers seem to be coming back, and they both seem to be happy. Overall success.

But today, I got the best reward ever. My bird got inside a box!

What will be next? The Pop Tart Cabin? 

Cardboard Playground.
source: Raige Creations

I can't wait to try other ideas, like with straws, dixie cups, who knows what else. 

They are happy, I am saving a ton of money, we all are happy. 

Next, I am going to try this.

source

To deal with this problem.

source: Raige Creations

What is one repurposing project you are proud of? 
Share your ideas, and maybe I can feature YOUR project. 


Repurposed {Sentimental} Stained Glass Window

$
0
0
make it monday, stained glass, diy, repurpose, vinyl lettering, sign
When I was four the big white moving truck rumbled up the driveway through the shadow of that massive apple tree and parked in front of the trailer.  Red brake lights still dotted the back end of the house and dark paneled walls decorated every surface and I would have sworn that it was Mary and the sweet Baby Jesus peeking out from a certain stain in the bathroom veneer - oh, that gorgeous green porcelain that stood so proud for so long!  Every room was carpeted and in the (carpeted) kitchen, a skinny little room divider held a piece of yellow glass that was probably pretty in 1964.
 
Such change this place has seen! 

And when we bought it from my parents in 2012 people were surprised to hear that beneath all the paint and love poured out upon this home it is still that humble little trailer I carried my teddy bear into in 1983.
 
set building, hanover missionary church, christmas eve serviceMuch has changed - including that strange partial wall that held the stained glass - and it has leaned against the back wall of the barn, collecting dust and cobwebs and sparrow droppings for years, waiting to be rediscovered and put to good purpose.

When scrounging for bits to aid in the building of a set for the Christmas Eve Service at my church, I stumbled on it and all the memories it held of family dinners and mom making cookies and dad baking bread and it saw new life on a sanctuary stage. 

 
Then, with the service behind us, there was no way I was going to see my window damned to the vortex of chaotic evil that is 'The Church Shed' (*shudder*) so I slipped it quietly into my trunk while the dismantling took place, knowing I could offer it a better future.


And I did!

1. Gather & prep your supplies.
a.) You're probably not as lucky as me to have a sentimental piece of your childhood trailer but you can find old windows just about anywhere you can find 'old junk' and frankly, the search is the biggest part of the fun! Stained glass just makes it that much more special - though, if your plan is to add lettering like me you'll want to look for single paned windows so your words don't compete with a pattern (unless you're going to use a single word like 'JOY' or 'WASH' - which, by the way, would be totally cute in a bathroom or laundry room!) 
b.) When I discovered vinyl lettering packs at my local Dollarama, I bought every saying they had because I figured that at some point I would find a place for them and for a whole dollar I decided I could afford to take a chance! I have also seen lettering sold at craft stores and department stores (but for a whopping lot more than a dollar!)
c.) I used white, acrylic craft paint but you can use whatever colour strikes your fancy and matches your decor
d.) I gave the frame a quick sanding and the window a quick clean - there were still come barn cobwebs left despite it's use in the church set.


make it monday, stained glass, diy, repurpose, vinyl lettering, sign


2. Paint.  That's self-explanatory, right? Because I wanted a bit of a worn finish I didn't try hard for full coverage or careful edges. This was kind of a 'slap and run'project.

3. Sand. Once the paint dried, I used a sandpaper block to rough it up and wear it down until I got the finish I wanted.

4. Clean. I wiped down the frame to clear away any dust from the sanding and I washed the window with some generic glass cleaner.

5. Add your lettering. Using a dry erase marker I marked where I wanted my lettering to begin and end to ensure I was centering it before putting it on.  My words came on one long sheet which made it a breeze to apply.


make it monday, stained glass, diy, repurpose, vinyl lettering, sign

Peel off the backing and line up with your dry erase marks.  When you're happy with how it's lying, rub your fingers over the lettering - the firmer the better - then carefully pull the paper away, leaving behind the vinyl.  You'll want to do this slowly, especially around 'swirly' letters or anything like an 'i' because you want to make sure the 'dot' doesn't get forgotten.


make it monday, stained glass, diy, repurpose, vinyl lettering, sign


6. Give it a place of honor. It wasn't until it was finished that I realized I didn't actually have a place to put this beauty. After trying a few different locations without success, I settled on the piano - it needed a decor update (and it was time to dust so it needed to get cleared off anyway).


make it monday, stained glass, diy, repurpose, vinyl lettering, sign


make it monday, stained glass, diy, repurpose, vinyl lettering, sign


Happy crafting!

First shared here

Alanna Rusnak writes honest blog posts reflecting her world as a mother of three, wife of one, employee of a church, and a lover of beauty over at SelfBinding Retrospect&

Knitting Pattern: All Smiles Wash Cloth

$
0
0

I recently found an old flash drive in a old box college stuff. On it, I found a few patterns I had written. I’m no pattern designer. I guess I was bored one day. I did post this pattern to one of my former blogs. I’m reposting it here with corrections that were found by Ravelry member, InvisibleMandy.


All Smiles Wash Cloth


Yarn: Any cotton will do. I used Sugar’s and Cream Solid.
Needles: US 7 straight needles

Cast on 44 stitches.
Rows 1-4: knit
Row 5: K4, purl to last 4 stitches.
Row 6: knit
Repeat last to rows 2 more times.
Row 10: K14, P4, K8, P4, K14
Row 11: K4, P10, K4, P8, K4, P10, K4
Row 12: K12, P8, K4, P8, K12
Row 13: K4, P8, K8, P4, K8, P8, K4
Row 14 and 15: Repeat Rows 12 and 13
Row 16 and 17: Repeat Rows 10 and 11
Row 18: Knit
Row 19: K4, purl to last 4 stitches, K4
Row 20: K20, P2, K22
Row 21: K4, P18, K2, P16, K4
Row 22: K19, P4, K21
Row 23: K4, P17, K4, P15, K4
Row 24: Knit
Row 25: K4, purl to last 4 stitches, K4
Row 26: K8, P4, K20, P4, K8
Row 27: K4, P4, K4, P20, K4, P4, K4
Row 28: K10, P4, K16, P4, K10
Row 29: K4, P6, K4, P16, K4, P6, K4
Row 30: K12, P4, K12, P4, K12
Row 31: K4, P8, K4, P12, K4, P8, K4
Row 32: K14, P6, K4, P6, K14
Row 33: K4, P10, K6, P4, K6, P10, K4
Row 34: K18, P8, K18
Row 35: K4, P14, K8, P14, K4
Row 36: Knit
Row 37: K4, purl to last 4 stitches, K4

Repeat last two rows two more times
Knit in St st for 4 rows even

Bind Off!


This pattern is for personal use. If you would like to use this pattern for other purposes, please contact me at craftyyuppie@gmail.com

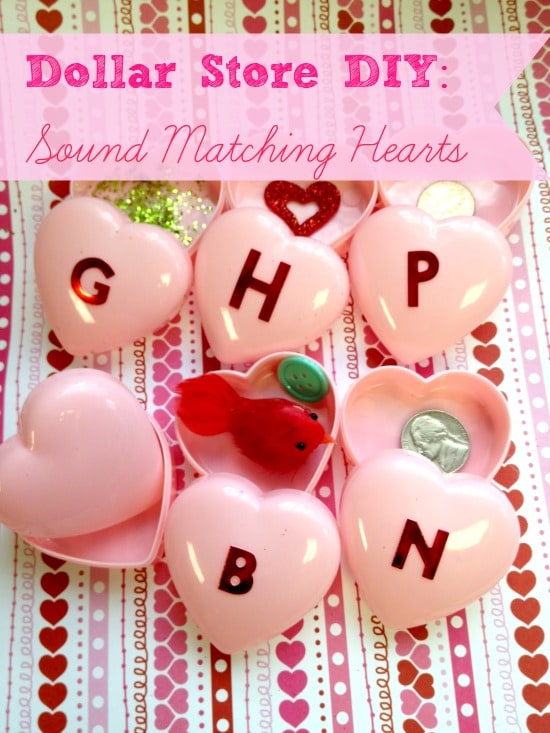
Dollar Store DIY: Sound Matching Hearts

$
0
0

You may not think that Valentine’s Day and learning games can go hand in hand, but in this case it totally works! Whether you are trying to teach children their letter sounds, letter matching, or even just want to encourage fine motor skills, this matching hearts game is the perfect solution. You can make your own version using a few simple dollar store supplies, so take a look below at how to get started for just a few dollars.

Dollar Store DIY: Sound Matching Valentine's Day Hearts

Supplies needed:

  • Plastic heart containers
  • Stick-on letters
  • Assorted small objects, each starting with a different letter of the alphabet

We were able to buy the plastic hearts at our local dollar store. A pack of 6 was only $1. You can also find peel-and-stick letters, as well as small items to place in the hearts, in a dollar store -- but you may even have assorted objects around the home that might work, so be sure to take a peek.

Sound Matching Valentine Hearts

Directions:

  1. Begin by peeling and sticking each letter of the alphabet on the lid of the heart container.
  2. Inside the heart, place a small object that starts with that letter.
  3. The object of the game is for the child to match the object to the letter it begins with. They can then put the item in the heart and replace the lid!
  4. You can also practice letter identification by placing a letter on the lid and the identical letter inside the heart. Shuffle the containers and lids and allow the child to match the letters together.

Sound Matching Valentine Hearts Activity

This Valentine’s heart matching game encourages letter recognition, sound recognition, and the assembly of the hearts even encourages fine motor skills. This is an easy and inexpensive activity you can enjoy with your child to encourage these very important skills!

Head to your local dollar store and grab the supplies you need to create your own version of this game. It is a fun and frugal educational game with plenty of Valentine’s Day flair.

Sound Matching Valentine Hearts Learning Activity

NOTE: Remember small children like putting small items in their mouths. Be sure you monitor this game if using younger children and small objects such as pennies, buttons, etc. If you want to avoid the use of these small items, a picture torn out of a magazine for the objects placed in the hearts will work, too.

TUTORIAL: How to Make Chinese New Year Red Envelopes (w/ free template)

$
0
0

Today, I am going to share a fun and simple tutorial on an upcoming holiday – Chinese New Year! In many Asian cultures, New Year’s is not always celebrated on January 1st, but on the ”new moon of the first month according to the lunar calendar.” In fact, some Korean friends in Cyprus invited us to celebrate Korean New Year’s based on the lunar calendar in 2013.

However, for as long as I can remember, my family has celebrated New Year’s on January 1st. But I have asked my very good friend, Catherine, who is Taiwanese-American, to share her experiences of how she grew up celebrating Chinese New Year. (Come back next Friday, January 31st, to read her post.)

But for now, I’ll share with you a simple DIY tutorial on how to make your own special envelope to ring in the New Year. While this DIY tutorial may take a few more minutes to crimp and fold some of the edges, I hope that you’ll find this design worth your while because it offers a little more space to neatly place your bill or even a small piece of candy.

Supplies:

Red card stock paper
Glue
X-ACTO knife/utility blade
Scissors (optional)
Print TUTORIAL Chinese New Year Envelopes Here (available in traditional and simplified Chinese)
Additional decorating supplies (of your choosing – to add your personal touch) 

chinese new year envelope supplies

Instructions:

(If you’d like to download a printable copy of the instructions, click here.)

Step 1. Print simple envelope template onto red card stock paper.

Step 2. Using an X-ACTO knife or utility blade, cut out red envelope design. Cut slit opening, which is above the words, “Happy New Year” in Mandarin.

chinese new year envelope tutorial step 2

chinese new year envelope tutorial step 2 complete

Step 3. Fold top and bottom pieces. See photo below for further details.

Step 3 Folding

IF

Step 4. Fold side edges, accordion-style, and top and bottom sides as well.

Step 4

Step 5. Glue accordion side edges to front.

IF

Step 6. Insert money, and place tab inside slit insert.

IF

Step 7. Voila! Project Complete!

(If you’d like to print out the instructions for personal use, you can click here.)

IF

Feel free to add embellishments, such as a zodiac sign specific to the year, to make your red envelopes unique. You can find plenty of fantastic year of horse zodiac designs on Google images.

Source: Zazzle.com

Also, remember to pick up a crisp new bill before placing it into your red envelope. You can read up on several other important cultural and customary traditions to ring in a Chinese New Year in the sources section below.

Don’t forget to come back on January 31st to read about Catherine’s personal story of how she and her family celebrated Chinese New Year’s. If you want to get to know Catherine better, read more of her posts on her blog, Live to Run, Run to Live, which details her adventures and experiences in running. She’s an amazing, honest, and hardworking working mom, who will motivate you to try out a marathon someday, if you’re not already a runner.

Lastly, here is a children’s story, “The Horse that Ran Away,” which has a Taoist-based moral at the end of the story. Stemming from Taoist beliefs, the story emphasizes “living in harmony with nature and what it brings to you” – whether it is good or bad. Perfect for celebrating the year of horse, wouldn’t you say? If you like this story, you can check out other children’s stories at Storynory.


Sources: 
About’s Chinese New Year
How to Say and Write “Happy New Year” in Mandarin
Chinese New Year Zodiac Wreath (another cool kid’s craft tutorial)
Wikipedia’s Taoism
Difference between Buddhism V. Taoism

Related:
Celebrating New Years, Korean-Style


From my hometown to yours,

Betty

How to Prep Trim for Paint

$
0
0

Phase two took over our home last week. Phase two and a few other projects (insert sneaky side glances here). I’ll get to the projects later.

Paint Trim Phase 2

We tackled the rest of our basement and wow! It makes a huge difference! Don’t get me wrong, it’s a lot of work. There is a long process of prep (which I’ll cover in a few jiffy’s) and the 13 corners and 4 doorways made it a lot more work than just the small 3rd bedroom with 6 corners and 2 doorways.

How to Prep Trim for Paint


I’m going over the steps to prep trim from my own experience. I will be covering the actual painting later on. It’s tricky with carpet, but we figured out a trick that I think is amazing and it works really well.

1. Remove Doors & Hardware

You could tape off the hardware if you wanted, but since I am also painting our doors it was MUCH easier to pull the doors off and take the hardware with it.

2. Wipe down all Surfaces

This is a step you really don’t want to skip. You don’t believe me? Look at the picture below… That was after two rinses and starting again. Yuck!

Nasty Rag3. Caulking Begins

Caulking was really important for us because our trim was never sealed to the wall. I learned this the hard way in the 3rd bedroom. There is a slim crack between the trim and the wall – after you pull the tape off there is a very distinct black gap between the trim and the wall. It was not nearly as “clean” looking as I’d hoped, but no worries, I fixed it.

4. Caulking Continues

Sorry about that sidetrack. Caulking is important for really clean lines. And I love those clean lines. It’s also T I M E  C O N S U M I N G! This was by far the longest step besides painting (including dry time). It’s important when you caulk that you wipe the caulk off with your finger or a damp rag. I found the most success with a damp rag – more wet the dry, but not drippy. It worked great and my hands stayed clean.

5. Tape.Tape.Tape

Allow for the caulking to dry completely (dry time will be on the caulk tube) before you start taping. I went ahead and taped everything around the trim besides the carpet. It took a lot of time, but was worth it for me. I’m not an expert paintbrusher and the safety of the tape made painting go a lot faster.

After the tape is on then paint away!


Before & AfterFinal White Trim

We are very happy with our result. I'm still pulling tape off of the doorways and the ledge, but the transformation is life changing.

Are you working on projects in your house? Check out our other house projects @ The Jaderstons

Valentine Keepsake Box

$
0
0

Don't you just love getting valentine's? Especially homemade sentiments.Do you have a special place to store your treasures? After receiving a bunch of cigar boxes, I decided to decorate it using some ephemera, a doily, and punches. You can use digital clip art, velvet, metal and other textures to add interest. View complete post here

Valentine Keepsake Box


what i love wednesday {No. 108}

$
0
0

and we're back! after a long respite and a little jaunt over to it's own blog {whatilovewednesday.blogspot.com} what i love wednesday is back! 83 weeks on lollipops and 24 weeks on it's own blog brings us to what i love wednesday number 108. i would love for you to join me and link up your loves once again each week. i hope you've missed wilw as much as i have! here's what i am loving this week FREE Valentine printables!

valentine's printables

click to enlarge!

lovely valentine cards from for the love of

arrow heart print from tatertots and jello

valentine tic tac toe from yours truly

and super cute valentine stickers from skip to my lou

yay! now it's your turn. link up your loves!

xoxo, krystina

what i love wednesday


lollipopscards.com


DIY Princess Wand

$
0
0

Charlie's 3rd birthday is this weekend! She WE are both so excited! She has been on a 'princess' kick lately so she really wanted a princess party. We got all of our party supplies and decorations a few days ago and we can't wait!


She really wanted a princess wand at her party. So we looked at Wal-Mart and in the princess isle there were tons of wands to choose from, but it was anywhere around $5-15 for just one wand!

We decided to make our own and that way her cousins and friends that come to her party can have their own wands as well! I got all the supplies for seven wands and the total was under $5!


Supplies:
glitter foam sheets
wooden dowels
beads or yarn
hot glue
glow in the dark star (for tracing on the foam!)
(and patience for a very impatient toddler!)


I used one of Charlie's glow in the dark stars in her room for tracing the stars onto the foam. You can use anything to trace the star, or you can free hand it, but I'm not that talented!

We originally thought about putting some beads on them, but Charlie decided she wanted some fun yarn instead.


We hot glued the yarn onto one star first, followed by the wooden dowel. 
Then we just glued the other star on top of all that. 
A few tips:
-Don't overdo it on the glue, when you push the stars together it will creep out the sides.
-It is very important to make sure you have the stars correctly lined up before gluing. One of the sides on my tracing star was a little off and that made a huge difference in making sure they were straight and lined up!
 
 
and.....
 
TA DA!
 
 
I think they are pretty cute and Charlie can't wait to pass them out to her friends! 
I loved that I barely spent any money on them, and it only took us a few minutes to put them together! 


Dyi barbie/doll wardrobe made from a photo storage or shoe box.

$
0
0


First, your supplies. I choose a photo box because it has a nice finish, smooth and fairly strong, but a shoe box would work fine too. You will also need decorative paper, Elmer's glue, hot glue, x-acto knife, metal ruler/strait edge, small wooden dowel, pen, paint (I used spray paint, but any paint will work), robe, cord or ribbon, beads or plastic bottle caps (for feet) and extra cardboard. I put in a mirror, I bought at an auto shop for replacement mirrors. You can cut it and it fairly inexpensive. Without the mirror, painting beads I had laying around and using card I already had, the total cost was $3.99 for the box but I had a 40% off coupon and $.59 per piece of paper, I used 4, totaling $4.75 plus tax.


Step by Step Tutorial: DIY Pillar Candle

$
0
0

Pillar candles are fun and easy to make! Plus, there are so many ways you can customize them with dried flowers, ribbons or even by engraving them. Of course, they are beautiful as just plain pillars if that is your preference. Candles – especially handmade candles – make great gifts, especially for Valentine’s Day. You can give the candles an enticing scent – add a touch of romance to a gift basket, or even just gift the candle alone as a thoughtful, homemade gift!

This easy do-it-yourself tutorial on how to make homemade pillar candles is my first article published on Parade.com I hope you will click over and read it. I was just so excited about being published there that I wanted to share the good news - and the article - with everyone here at BlogHer.com

I do hope you will enjoy the article and maybe feel inspired to make your own pillar candle. Valentine's Day is just around the corner and there is simply no better gift than one that is homemade from the heart.

Author - The Complete Idiot's Guide To Year Round Gardening, The Complete Idiot's Guide To Seed Saving & Starting, 101 English Garden Tips, Magical Gardens, Perspective Visions: Enigmatic Masterpieces.

Weekly Menu Chalkboard DIY

$
0
0

Look what my kids let me make this week? (ha. ha.) I meal plan every week. Now instead of having our menu for the week on a post-it on the fridge, I have this cute chalkboard sign to let the world know what we're eating. And it was easy - no stencil painting!

I simply bought a large framed chalkboard for $9.99 from Joann's and hot glued twine in the grid pattern (after measuring and marking even spaces, of course), then Mod Podged scrapbook letters for the title and days of the week.


And I love it. And I'm making dirty rice tonight - my husband's favorite. Stay tuned for the recipe.

http://fallapartwithjoy.blogspot.com

Digiscrapping Layouts

$
0
0

Well, that was a sad, sad game.  I really wanted the Broncos to win.  But I did have some fun with old friends on Facebook and who didn't love the puppy and the Clydesdales.  Definitely the best of what tonight's game had to offer.

Now it's time to talk about something happier, one of my favorite hobbies.  I love digital scrapbooking.  It combines three of my favorite pastimes: technology, scrapbooking and photography.  It is the perfect hobby for me.

Today, we are going to be looking at three layouts I created this past week.  This first layout was created as part of my work for Tracy Martin Designs creative team.  It uses one of my favorite digiscrapping elements, paint.  I know if I were to ever return to paper scrapping that I would need to use lots of paint.  The good thing about digital paint is that it's a lot less messy.

Michelle & Me Layout

The photo was taken when I finally got to meet my friend Michelle. We've been friends for years thanks to the Internet and I finally got a chance to meet her and her family when they came to Florida in 2012. It was a great meet up.

This next layout is actually a photoless layout. Normally when I do a page with no photos it's an art journal piece. This time, I am using ephemera as a means of sharing my desire to go to New York City one day. I love using ephemera, but it's often hard because of the types of photos I take.  So this time, no photos.

One Day I Will Go Layout

Everything on the layout is from Crafty Button Designs. You can find a full list of credits here.  I especially loved the torn look of one of the papers in the Flea Market Finds paper pack.  To enhance the look, I erased portions of the top paper layer so that you could see the paper layer underneath.

My final layout today was created with the Natural kit from Tracy Martin Designs.  I loved the blues and greens of the kit, so I had hoped to go outside and get some new photos to use with the kit.  Alas, it was a little cold outside for my blood so I found an older photo to use with the kit.  This layout definitely has a very paper scrapping feel to it.  At least I think so.  Most of my layouts used to be in this style, but I have branched out in recent years.  I will admit it felt good doing a more traditional style layout.

10 Mile Creek Layout

I love being able to share my layouts with all of y'all. I especially love hearing what y'all think of my latest creations. Feel free to leave me a comment below to let me know what you think of today's layouts.

Tomorrow is Monday. I hope y'all have a great week ahead of you. Whatever you do, don't forget to document your memories.

(Note: As a member of the Crafty Button Designs and Tracy Martin Designs creative teams, I receive free product in return for creating layouts.)

DIY Valentine's Frame

$
0
0

Hey everyone, I made this pretty Valentine's Frame for less than $3 and it was so easy!

I already had most of the supplies including the paint and the stickers which I found at the Dollar Store last year.  The only thing I purchased (from Wal-Mart) was the frame and a bag of wooden letters.  I took out the L-O-V-E and still have lots left to use on other projects.

Continue reading to find out how I made this cute little frame...

Valentines Craft Ideas

$
0
0

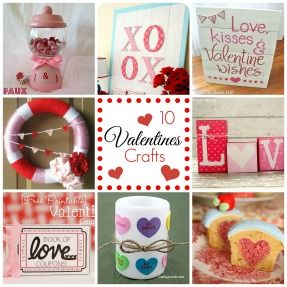
Hey everyone, are you getting ready for Valentine's Day? I love the beautiful reds and pinks of the holiday and the all the love that goes with it.

I've found some really cute Valentine's craft ideas I can't wait to make and I'm starting with this super cute Faux Gumball Machine from Love Sweet Love

Continue reading to see all the great Valentine's Craft Ideas I've rounded up...


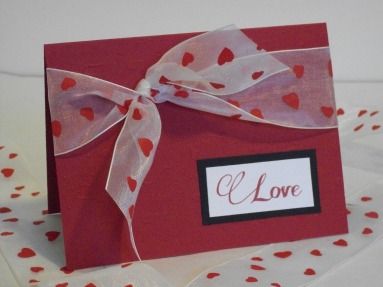
Handmade Valentine's Day Card

$
0
0

Its time to get ready for Valentines Day and here is one of the first cards I've created for this year.

I think the textured paper and ribbon give it an elegant look and I can't wait to get it in the mail. 

Continue reading...

DIY Wooden Heart Frame

valentine instagram heartstrings!

$
0
0

i made a sort of banner with 'loving' instagram pics and hung them from hearts on strings over the mantel. heart strings instagram hearts 1. cut out various sized hearts with your favorite cardstock, you can use a shape punch if you like - i just i hand made mine.

2. make two of the same size for each heart you want so you can place them on either side of the string or twine.

3. use your favorite adhesive to stick hearts together.

4. cut twine at varying lengths and attach with mini clothes pins! instagram heart strings 5. attach twine across your mantel and use more clothes pins to hang each heartstring photo :)

IMG_2435

lollipopscards.com

7 Fun and Simple Washi Tape Crafts I Want to Make

$
0
0

I've become something of a washi tape addict. I don't want to tell you how many rolls I have or how many different storage containers are filled with it. Let's just say I have a lot but not as much as some people I know.

This is the first washi tape I purchased at a Ben Franklins in Kailua, HI, somewhere around 5/12/12.

This is the first project I ever did, using washi tape. My daughter and I made closet dividers for my grandson's wardrobe while we waited for him to make his appearance. Here's the post about children's closet dividers that inspired me and I pinned this post about closet dividersthat set me on the path toward using washi tape!

Right now I'm mostly using washi tape in my Filofaxes and art journaling, though I have a lot of ideas about how I want to use it in the future. Here are some of the posts that are inspiring me to do more with my washi tape stash.

NEXT ⇒


Image Credit: The Learner Observer

I think I'm going to do something like this Planner Makeover to decorate the cover of my next art journal.

NEXT ⇒


Image Credit: Mailbox Journey

I have some grungy votive candles that would look awesome with this washi wrapped votive candle makeover.

NEXT ⇒


Image Credit: Grow Creative

I'm thinking about turning some scraps of paintings done by my grandson, Johnny Mac Pippin, into note cards using this watercolor washi tape thank you note idea.

NEXT ⇒


Image Credit: Polka Dot Chair

When we move in a couple of years, I'm going to make these washi tape letters to decorate a space for my grandson. So adorable, right?

NEXT ⇒


Image Credit:
Spool and Spoon

I love this washi tape sculpture and since my daughter loves elephants, I'm going to use the washi tape from my grandson's room dividers to cover an elephant this way. I think it will be a nice reminder of the craft we did together while we waited for him to arrive!

NEXT ⇒


Image Credit: Making Home Base

I'm very tempted to add a washi tape wall accent to my office. I have some nice typewriter tape that would look cool -- but I might not have enough. I wonder if I can find a few more rolls...

NEXT ⇒


Image Credit: Jennifer Rizzo

Last but not least, why didn't I think of this? You can make your own washi inspired tape in exactly the colors and designs you want. Duh. Must try this ASAP.

Have you made something awesome with washi tape, leave your ideas and links in the comments below -- you can never have too many washi tape ideas (or too many rolls of washi tape...)

~Denise
BlogHer Community Manager
Flamingo House Happenings

How I Made a DIY Day Planner

$
0
0

I think we've talked about my planner addiction before. I am drawn to them everywhere I go. It is acceptable in the store, but my addiction goes beyond that. I will walk up to a stranger writing in their beautiful planner and ask them where they got it!

I have been super picky and choosy about one lately. I have loved Emmy's Much Ado About You, as you may have noticed, but I wanted a page every day. I went back to my old pal Franklin Covey, which has a page per day -- but it's are lacking things I want out of a planner. So I decided to make my own.

planner, calendar

Little did I know what I was getting myself into. I have a new appreciation for Emmy :)

DSC_0073

I used Adobe Illustrator to make my planner. First I doodled on a piece of paper all the things I wanted for each day. Then I took that to my computer and started to work. After I got the first couple of pages how I wanted them, all I had to do was copy and paste... and also change the days and dates. You can do it, too! Or you can purchase the one I made here.

planner

DSC_0066

Here is an awesome link on how to do double-sided printing, so March 6 comes after March 5 and so on.

DSC_0076

I used 30# bright white, super smooth paper. I wanted it thick enough not to show words through the other side, but still thin enough to move like regular paper. I wanted it smooth for writing -- and I love the touch!

DSC_0079

Every other month ends with fun list starters, journal ideas, and planning prompts. Binding was $4 at a local print stop and it took less than a day. DSC_0072DSC_0078DSC_0102

My favorite pencil? My TUL from Office Max. Love! Write it in pencil unless it is unchangeable like Christmas, because plans change!

DSC_0103

I also wanted a place to journal a quick snippet to remember my day. And even more important, I wanted a spot to write something I am thankful for each and every day. I loved One Thousand Gifts.

DSC_0063

I made the cover and back with scrapbook paper from Basic Grey and laminated them and had them all in order when I took my planner to the print shop.

DSC_0106DSC_0105DSC_0083

Details on the planner I made:

  • 8x10 planner
  • One page per day with two page per month layouts.
  • 4 colors rotate for 3 months each: candy peach, aqua, lemon yellow, and raspberry.
  • Includes US holidays on month and day.
  • January 2014 - December 2014.

Each day has:

  • A to-do list
  • Appointment slots from 7:00am to 9:00pm
  • An area for household
  • An area to plan meals
  • A place to journal
  • A place to write down something you're thankful for
  • A place to track exercise
  • A place to track spending
  • A place to track vitamins
  • A place to track water
  • There are even little weather icons to track the day's weather

And the months are lined!!

DSC_0071

DSC_0096

lollipopscards.com

Viewing all 1382 articles
Browse latest View live