Quantcast
Channel: Crafts - BlogHer Topic Feed - All Posts
Viewing all 1382 articles
Browse latest View live

Digital Stamps Suck?

$
0
0

That's so mean!  Some people are upset that we even say the words digital and stamping together. I'm a professional artist and, dare I say it, I illustrate digital stamps.

Hand made greeting card using digital stamps for cards.

There are on going discussions about digital stamps for cards and digital images.  People wonder whether or not using “digital” images vs. stamped images is considered hand made card making. Here are some of the comments I’ve read: read more....


Add a Pop of Color to your House {Front Door Update}

$
0
0

I have been itching to bring some color into this house for awhile now. We have been working with Ultra Bright White the entirety of our time here. So when I went to Home Depot last weekend I was ready to make an impulsive purchase.

Meet Seafoam Pearl

Screen Shot 2014-04-21 at 10.38.08 AM

Now if I had really been thinking I would have picked out a color palette for the room before I went and impulsed the Seafoam Pearl because now I am stuck on what to do for curtains and pillows and how to tie it into the kitchen and dining room. Woof!

But anyways, this is how I updated the inside of our front door!

IMG_2045IMG_2046IMG_2050Before AfterFeature

This update was so easy and it really brightened up our space. It only took two coats of paint -  so about 45 minutes of paint time and 4 hours of dry time! We are loving it! And I can say that because it has been about a week since the update and I have yet to feel any paint regret. 

Happy Day!!
Love, Kelsey @ The Jaderstons

Exterminate!

$
0
0

from April 8 :)

Sorry I've dropped off the face of blog Earth for two weeks.  I have no great reason for this.  Except that the four-month sleep regression is ruining our lives.  In a bit of good news, quitting dairy is working like gangbusters and baby's weight is shooting up the charts!

I hope I can make up for my absence by sharing my most recently completed projects.  It is something I wanted to make since Veronica was just a twinkle in my eye, and I'm so happy to have it finished.  Please say hello to mummy's little Dalek.

 
I knit this dress for V using Knit Picks Swish Worsted in Marble Heather and Black.  The free pattern comes in a single size, and that size is very short.  To make it fit my Amazon baby, I ended up adding many rows throughout the pattern.  I decided the easiest way to do this would be to create a chart and to do the pattern top-down instead of bottom-up.  I'm so glad I made the changes, because I got a perfect fit.  This is maybe around a size 9 months long (seriously, baby Amazon), and I think we should get a good long use out of it as she grows and it moves from dress to tunic to shirt.


This was my first time working with bobbles and I thought they were pretty fun.  They sure do eat up yarn, though.  Since I was making this dress so much bigger than called for in the pattern, I had to order more yarn (I ordered this yarn before she was born, expecting her to be a bit more average in size).  I had dye lot issues, so I used one dye lot of grey and black for the skirt (not including borders) and a different dye lot for everything else.  It worked out nicely.  I stranded the black yarn in between the bobbles (apparently some people do them more like intarsia).  I'm just extremely pleased with the entire project!  So I can't believe I didn't get on here sooner to share it. ;)

I've embarked on something new and relatively epic.  I'll share progress photos soon.

what i love wednesday {No. 119}

$
0
0

scrapbooking!

i have been scrapbooking since Soleil was 6 months old, so i guess that means i have been scrapbooking for almost 15 years now. i was drawn at first to all the pretty. and preserving family history seems wise. scrapbookers i can't frame all the pictures i take and i makes me sad to think they'll be sitting on a hard drive somewhere unseen. we take so many photos - even when i started scrapbooking while taking film photos! now we take an exorbitant amount of photos with our digital cameras and now on our iPhones.

we share via facebook, twitter, and instagram. but have you ever tried to go back a year on your social networks? it's hard.

i can pull 2007 off my shelf and look back at our move to Lake Tahoe and back.

i can look at our trip to New York City in 2008.

family and friends that come over can share in the experience and look through the years as the kids have changed and grown.

scrapbooking

the most precious reward for me is to see how much the kids love going through the scrapbooks i have made, talking about trips and memories, and family visits, and things they used to do. they pour over them. sigh, this is gold. i love it.

scrapbook

when i lived in morro bay my friends who introduced me to scrapbooking would get together monthly and scrapbook... together. i know! in real life! this was not just scrapbooking, this was building friendships, bonding, creating together. sharing our stories with each other. besides my family pouring over my scrapbooks this is the other beautiful reward that comes with scrapbooking good friends, old friends, new friends, and a lot of laughs! i still go up about once a year to a 4 day scrapbook retreat with those ladies. but i need to get a group going where i live too.

scrapbooks

scrapbooking is not dead. i thought maybe it was because i can't seem to find anyone in san diego county that wants to do it with me. but i see women in the scrapbook isle at michaels and my heart skips a beat - oh! they scrapbook, yay! should i go up to them and invite them to my house? yikes, probably not a good idea. and i see a large following for the project life series. and i see tons of gorgeous sites dedicated to scrapbooking, such as studio calico, crate paper, basic grey... with online classes and kits. there is hope, a flickering light of a small candle burning, glowing brighter.

scrap book

i encourage you to find a way to preserve your photos where they can be seen not just on your walls, and definitely not hiding on a hard drive somewhere. have you had a picture on your wall and had to explain where you were and what the kids were doing and what happened and maybe why you took that photo in the first place? that is scrapbooking, now put it on a page and write those things and thats it. easy as pie and definitely sweeter.

scrapbook images via studio calico

what are you loving today???

xoxo,
krystina

lollipopscards.com

Mother's Day Idea

$
0
0


Cards using Kitty and Kitten digital stamp.

Above are some examples of the “Kitty and Kitten” digital stamps used different ways for card making.  My favorite is the card with the lace and peach paper.  My Mother-In-Law gave me some of her old vintage lace to use in card making. Lucky ME!! This kitty and kitten digital stamp is a versatile image for Mother’s Day or friends or sisters. The image kind of reminds me of my little Sissy and I.

I love how easy the images are to cut out and arrange on cards. Whether you cut the kitty’s entirely out or use the PDF pre-formatted version of the digital stamp they are fun to play around with.  I added some words to your PDF, “Happy Mom’s Day!” and “Happy Mother’s Day”.  I needed words to use on the pink card above so I thought I would share them with you. I’m offering this digital stamp in JPEG and PDF formatted to 3.0 x 3.0 (a square image this time) with a light gray line for easy cutting out and attaching to cards, just as you see above. Read more....

Card Making Artists

Vintage animal art prints for all of your crafty creations

$
0
0

Dogcat


Would love for you to stop by if your looking for some prints for your projects!   

Still adding a few each day, have hundreds to list yet!!   

www.etsy.com/shop/romeolovesrose 

Sandy 

10 Unique Mother's Day Gift Ideas

$
0
0
Avoid the knick knacks and try these 10 Unique Mother's Day Gifts!


I love anything that my children give to me or make or draw for themselves or make at school or just leave sitting around the house taking up room.  I love it all.  So much so that I have a VERY hard time parting with "stuff" and I constantly letting it pile up so that I can avoid having to make decisions about (**cringe**) what to throw away.

When I was a child, my mother was the same way.  She still has boxes and boxes of things that each of us made throughout school and as gifts.  Eventually, I realized that I was just adding to clutter and I made a conscious decision that I was not going to buy or make her things that weren't something to cherish or performed a actual function.  No more knick knacks, no more random papers or hand made cards.  I want my gifts to be meaningful or functional, preferably both.

For those of you who are looking to make or purchase something that is unique for Mother's Day, a birthday or maybe a teacher gift, here are 10 Unique Gift Ideas:


Membership to a CSA:  Read this post on what a CSA is and the benefits of joining one.

 
Please take the time to visit each original website for directions and other ideas.  These are my 10 favorite, but there are TONS of others!


Something New

$
0
0

I'm going back to work next month.  I'm hoping that my schedule will allow me to leave a bit earlier in the day than I used to, spend time with V, and then finish up my work for the day after she's gone to bed.  One serious issue with this plan was lugging my massive laptop back and forth every day.  So not appealing.  Imagine my excitement when I was notified yesterday that I could access firm materials on an iPad!  I ended up buying one today.  I think it will be a big help.  It will also probably get me blogging more often, since laptop access has been my biggest hindrance (I actually have a list of topics to discuss saved up!).


First on my list: something I forgot to include in my last post.  One of my favorite things about my sweater has been the new technique I've learned, jogless stripes.


Not bad, right?  Remember, I knit left-handed, so I can't promise results for righties.  For lefties, pick up a loop at the end of your last row of color 1, like you are going to make 1, but without knitting into the loop.  At the end of your first row of color 2, slip the last stitch, knit the loop, and then pass the slipped stitch over the loop.  I think it hides the jog beautifully!


It does not hide the fact that my careful machinations have done nothing and this sweater is a tornado of pooling colors.  I think I like it, though.  I hope so, since I'm about to do the sleeve shaping and I've put a ton of work into this!


Disney Tangled Tower Pinata

$
0
0

Rapunzel Pinata Tower 

Tangled Tower Pinata Tutorial


Let's get all Tangled with this awesome Rapunzel Tower Pinata! Just kidding, although sometimes I get swept away with my ideas. I am a huge fan of Disney Tangled.   Are you looking for Girls Birthday Party Ideas? You are in luck, Disney Frozen would be an awesome theme but if you are looking for something much less frozen consider a Rapunzel Theme Party.  Are you looking for other Tangled Birthday Party Ideas simply click on the image below and get ready to be filled with creative ideas. Princess Dollar Tree Decorations  I love Pinata's and this is one of my favorites. I actually made two Tangled Pinata's because I had so many ideas flowing. Check out the tutorial for Wanted Finn Ryder Pinata. Tangled Tower Pinata

What you Need:

- Cardboard Box - Packaging Tape - Bungee Cord - Tissue paper of all colors - Tan, Yellow, Pink, Purple, Brown Cardstock     The majority of these products can be purchased at Dollar Tree or Walmart for around $5. Make sure to ask employees for boxes they may be throwing out. I like using Christmas Gift boxes because they are lightweight but very sturdy. I got mine at Dollar General after Christmas clearance for $.10 for 2pk.

How to Make:

1. First you will need to cut out the base and top rim of the base. Both of these are around 6 inches. You can use a bowl for the shape. Cut 2. Determine the height you want your tower. I like the size of the Christmas gift boxes without the sides. These are the larger boxes so when you put them in a circle it will be about 5 inches. My circles are 5 1/2 inches in diameter. Tangled Pinat Step 1 2. Now take your packaging tape and tape the tower to your base and do the same to the base top. Tangled Pinata Step 2 3. Now cut a circle about 2 inches larger than the base or larger if you desire. I did mine at 8 inches. Take cardboard and make a cone shape with the bottom the size of the bigger circle. Not pictured is also a 3-4 inch height strip that is taped on the rim for the top part of the tower. Tangled Pinata Step 3 4.  You will be taping it on but first you will need to poke a hole at the top to allow the bungee cord to pass through. Tape extensively both top and bottom of the bungee cord. You make want to reinforce it with left over cardboard as I have done. This gives it just a bit more secure so it will hold up for many of your guests. Just so you know, my pinatas are known to be hard to break even though I do my best to use less and less tape. Tangled Pinata Step 4  

Finish Reading the Tutorial


A HANDmade Mother's Day Bouquet

$
0
0

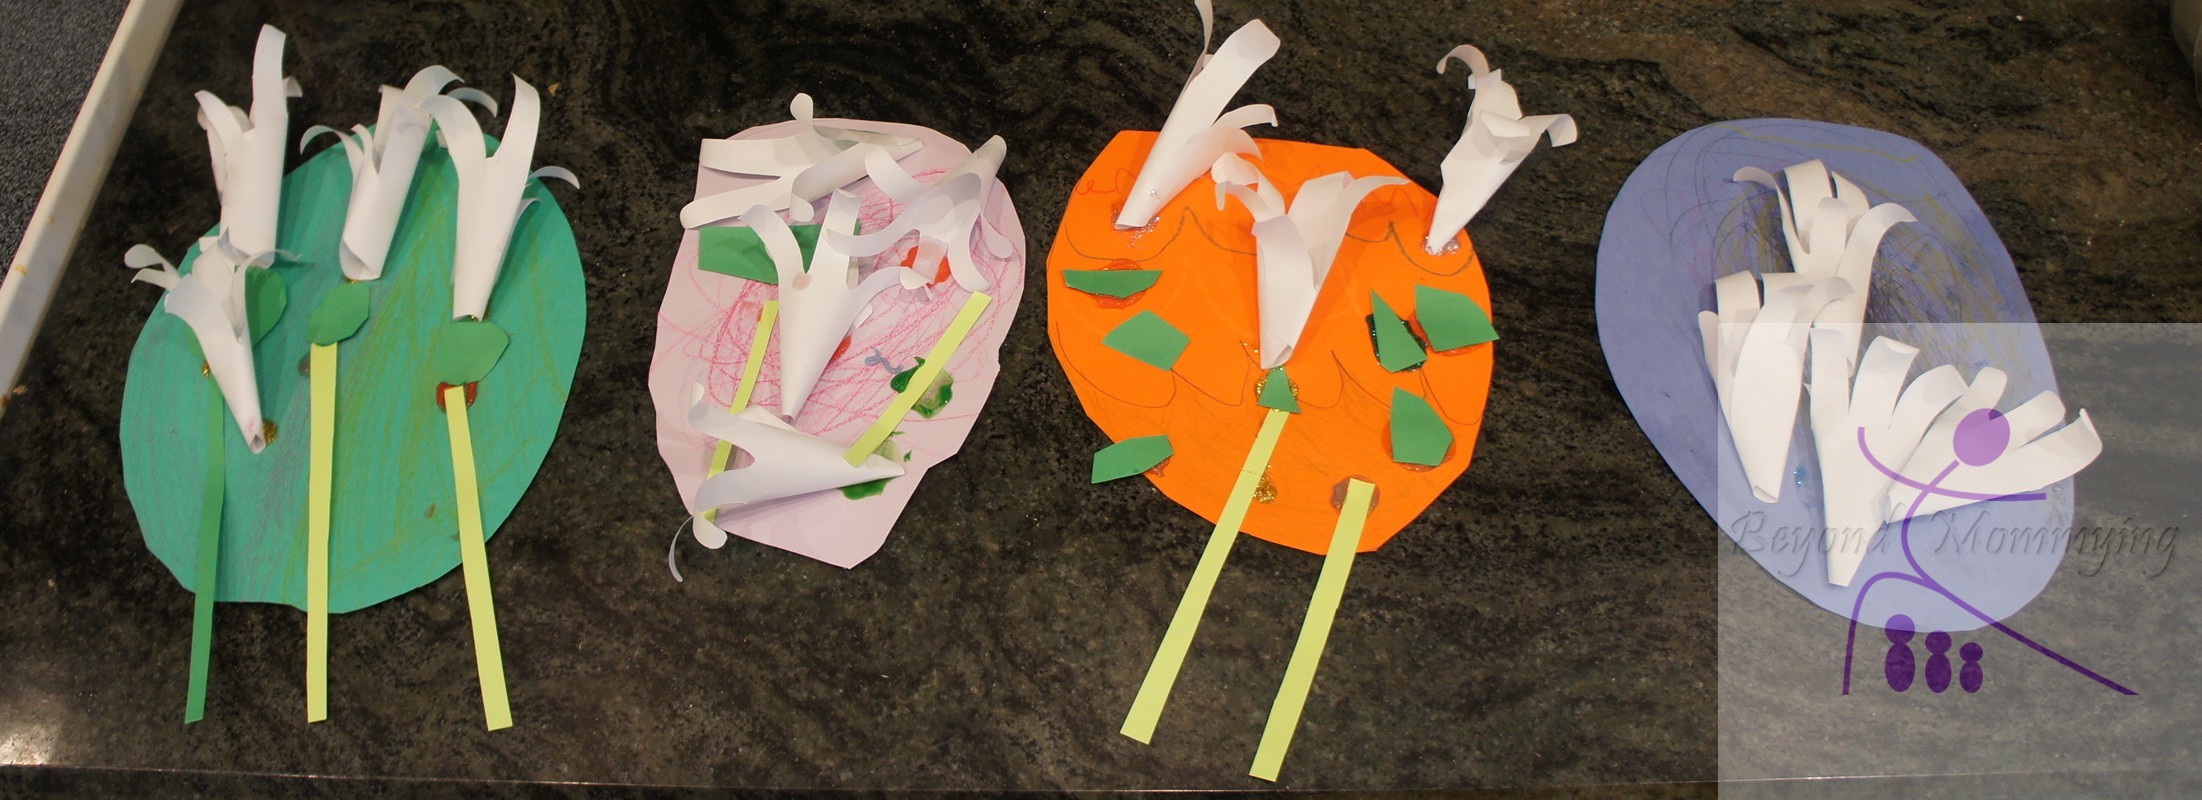
Here is one of the easiest but most beautiful and meaningful Mother's Day Crafts you will ever find.  It looks complicated and does take a little time, but I'm confident even the most craft-deficient dad or grandparent can pull this one off!

SONY DSC

SONY DSCAll you need is:

  • A piece of background paper
  • A piece of computer paper
  • Some green paper
  • Scissors
  • Tape
  • Glue
  • A pencil
  • Crayons/colored pencils/chalk (optional)

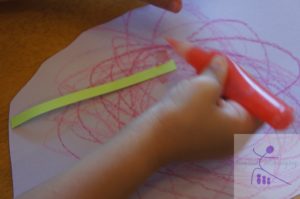
SONY DSCWe cut our background paper into an oval/egg shape (since this could double as an Easter craft) but you can keep it simple and leave the paper as is.

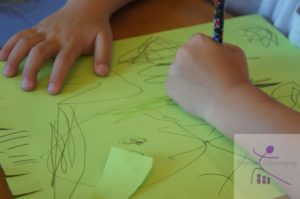
I let the kids color their egg (this step is optional)

Fold the piece of computer paper into quarters (flashback to school: fold it "hot dog style" then "hamburger style")

Trace your child's hand with fingers spread onto the folded paper and cut it out (you should end up with 4 hand prints)

SONY DSC

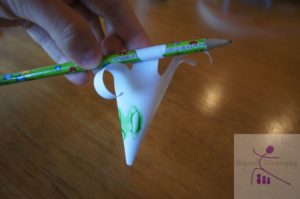
Roll each handprint's palm into a cone (fingers facing up) and tape

SONY DSC

Use the pencil to curl each finger by wrapping each finger around the pencil and rolling it down to the palm

SONY DSC

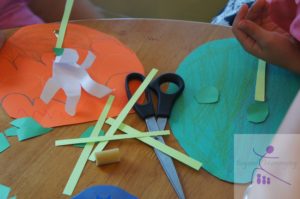
Cut strips from the green paper for stems and leaf shapes (optional)

Glue (or have your child do it if old enough) the hand flowers, stems and leaves onto the background paper.

SONY DSCSONY DSC

Done!  (These show are completely kid-made.  For a more traditional parentmade version, here was our inspiration)


Bowling Trophy Wine Bottle Toppers

$
0
0

Mother’s Day is this Sunday. Why don’t you get Mom what she really wants this year: a night off and a bottle of wine? I’m not saying it's appropriate for a 5-year-old to give her mother a drink—I’m talking about me giving a bottle to my mom, who has been well over the legal drinking age for quite some time.

Trophy wine bottle toppers

Merlot, Pinot, Malbec—they will all look more dashing and feel more thoughtful with a customized wine bottle topper. The nice thing about these toppers is that they can transfer from bottle to bottle.


SUPPLIES

Trophy wine bottle toppers - unscrewed heads
  • Trophies (easily found at the thrift store)
  • Drill or awl
  • Craft paint, markers, et cetera
  • Small fabric trim
  • Corks
  • Strong glue

Trophy wine bottle toppers - thrift store bowling trophies

The first thing I did was procure some trophies. Lady bowlers in skirts always make me giggle. The thrift store is usually ripe with trophies of all types, and the decorative trophy toppers easily unscrew from the base.

Trophy wine bottle toppers - paints and pens

Using various paints and pens, adorn your trophies. The sky's the limit. Give them collared blouses, polka dots, spiffy shoes, and flowers in their hair.

Trophy wine bottle toppers - painted ladies

Allow the paint to dry completely.

Trophy wine bottle toppers - lady with trim

If you are so inclined (and who wouldn’t be?), you can go in and add trim, ribbons, and ball fringe as belts and whatnot. Secure with glue.

Trophy wine bottle toppers - drilling the cork

Using a drill or an awl, start a hole in the top of your cork.

Trophy wine bottle toppers - in corks

Using a strong glue, twist your trophy topper into the hole. Once the trophy has been screwed down flush with the cork, allow the glue to dry completely.

Trophy wine bottle toppers - in bottles

Pick out Mom’s favorite bottle(s) of wine, switch out the corks, and tell her that it was really “a lucky strike” getting a mother like her.

Trophy wine bottle toppers - closeup of the bowling ladies

And they're not just for moms! These make great thank-you gifts for someone who completely "bowled you over."

Trophy wine bottle toppers - closeup of a bowling lady

Maybe you could tell someone, "It strikes me that you might be my best friend." The puns are endless!

Create Easy Chalkboard Signs for Your Next Event

$
0
0
Photo by the Big Change Project

Chalkboard signs are a great decorative element for your next event. Here's an easy way create and print them from your computer.

•    •    •    •    •

I have been working on a fundraising event for our local high school jazz program.  There will be a more complete post about this fun-filled event in the next couple of weeks. But, in working on the decorations, I came across a great resources I wanted to share.

For our event, we decided to create chalkboard signs in keeping with our coffeehouse theme.  Purchasing chalkboards can be expensive and hand-writing them can be tedious - especially if you are a perfectionist like I am.  Generally, I prefer to work on my computer where I can quickly edit and tweak until something is just right.

I purchased inexpensive wood frames from Michaels which could be used as-is or quickly stained to a darker wood.  In working to create the signage for the event, I came across a terrific tutorial and downloadable chalkboard background from The Gunny Sack.  Tonia created a perfect chalkboard image that you can easily insert as the background in a simple Word text box.  She has links to a variety of chalkboard fonts you could use or you can just use the "Chalkboard" font that comes as part of your computer's standard font package.

The signs are perfect for our event!  If you want an easy way to create chalkboard signs yourself, be sure to check out Tonia's tutorial at her blog, The Gunny Sack.

Photo by The Gunny Sack

 Do you have a great tool you like to use?  Share it with us!  We'd love to know about it.

BCP BIG Tag Line

The Big Change Project

http://thebigchangeproject.com/

How to Make Stained Glass - Quick and Easy Mother's Day Gift Idea

$
0
0

Tinting glass is just a trip to the craft cabinet and baking pantry away.  Surprise mom this Mother's Day with an adorable desk top container that you made yourself.  Check out the full tutorial by Jennifer Perkins.


Set a Theme and Let Your Attendees Do the Decorating for You!

$
0
0

In fundraising, budgeting is imperative.  When hosting an event, big dollars are often spent on decorations to create a fun and lively atmosphere.   Here's a great idea for how you can decorate and get that party vibe without spending your hard earned dollars.

•     •     •     •     •

Having a game night?  Bingo night?  Trivia night?  When you are hosting a fundraising event, there is always that fine line drawn  between creating a party atmosphere and how much to spend on decorations.  While decorating the venue can create a more festive mood and often lead to greater giving, spending hard earn dollars on balloons, posters, centerpieces, etc... seems like a bit of a contradiction.   So we, at The Big Change Project, discovered an interesting solution to this age-old problem.

Have your guests bring their own decorations!

We know, that sounds crazy.  But, done right, this can be a really fun way to engage your guests in the event AND reduce your event costs so that more money goes back to your organization.  Here's how it works...

Host an event with groups of people sitting at tables.  You set the theme and instruct guests to get together as a table and come up with their own decorations for their table.  These could be purchased decorations or made at home.

Vintage psychedelic 70s party by Melonstone, via Dreamstime

For instance, if the theme is "The 70's," tables might get groovy flowers or disco balls as a centerpiece, tie dye tablecloths, record albums, etc… to decorate their table.  To take it one step further, why not encourage guests dress according to the theme?  G0-go boots, mini-skirts, fringe vests - it's groovy!!

OR

 Found on eyecandyeventdetails.blogspot.com
Found on eyecandyeventdetails.blogspot.com

You could host a party with a "Rock Star" theme.  Some groups may choose Big Hair Bands while others choose grunge.  Some may go old school and sway towards the Rolling Stones or the Beatles, and others might enjoy the full makeup of KISS.  Record albums as placemats with cd's for your centerpieces are a good place to start.  Inflatable guitars and crazy hats will add to the mood.

OR

Photo by Amanda
Photo by Amanda

If you want something simple and easy, assign each table a color.  All of the decorations must stay within their designated color.  The overall effect will be a rainbow of festive decorating, and you and your committee didn't have to lift a finger!!

The bottom line - you determine a theme and then each group runs with it.

To make it even more fun, award prizes for best dressed, best table, or most “spirited" - it will help create a buzz about the event leading up to the big night.  It gets people engaged in the fun instead of just showing up.   Engaged people have more ownership in the evening and will tend to be  more giving.

We would love to hear how you save money and time decorating for your events.  Remember, the more money you save the more money you have to support your organization.

BCP BIG Tag Line

The Big Change Project

http://thebigchangeproject.com/

Recycled Plastic Bottle Cable Knit Bracelet

$
0
0

So here’s the scoop. My mom drinks damn near everything from a single serving bottle and they don’t recycle. It drives me nuts! So I’ve been hoarding them in bags and stashing them in my closet. While there are a lot of really great plastic bottle DIYs, a lot of them aren’t practical for my space or really my style.


I had to really think about what I wanted to try with them. As I was examining the tiny Coke bottles that dominate my stash, I noticed that they have one perfect smooth band in the center. That’s kind of perfect for a bracelet base, says I. The plastic gives a sturdy base for the cable pattern while also lending it a natural curve. I love chunky bracelets but hate the noise. I also love wearing jewelry, but not when it gets cold against my skin. Bingo! This uses all recycled materials and is a great way to use up that stash yarn you've got sitting around! Happy recycling.  

Visit my site for full assembly instructions and the free pattern. 

Fanofstuff.com: Crafts, Food, Fandoms & More

 ZyloHandmade: Handmade gifts and accessories


Best Card Making Personality!

$
0
0

Card Making Artists

Featured artist Dana Joy

My Featured artist Dana Joy is such a fun and inspirational card making artist.  I love her vibrant personality.  She is always learning new things and finding new ways to create her cards.  She has various card making videos here and she is involved in a bunch of different design teams.  I love that she is taking a watercolor class and busy with so many different card making techniques and products.

Dana is fun to interact with online and very encouraging.  She always comments on peoples cards giving them support.  This is a rare and beautiful attribute.  I’m really glad Dana agreed to be my featured artist.  It has been a pleasure to know her and be inspired by her. I love that card making is fun and relaxing for Dana and that card making has seen Dana through some tough times. Read more....


Dye Your Own Pretty Silk Scarves! One of my techniques....

$
0
0

How to dye silk scarves, Fiberartsy.com

Marble Dyeing Silk Scarves
A Fiberartsy.com Tutorial

Don’t you just love a pretty, colorful silk scarf? Did you know that it’s actually very easy to dye your own? All you need is the right tools and some basic know-how.

There are many, many different techniques for “marble” dyeing fabric. I like to experiment with different folding and tie-dyeing methods. Also, there are many ways to set the dye so your final scarf won’t bleed. The acid dyes I use have to be heat set. This can be done by steaming your scarves, heating in the oven or with your microwave. I personally stay away from microwaving silk scarves because it’s too unpredictable (and can burn up your microwave).

To begin, cover your table with plastic and make sure you wear old clothes!


Supplies Needed:


100% Silk Scarf 
Acid Dyes 
(You can also use special dyes made specifically for silk fabric)
White Vinegar
Plastic Gallon Bags
Disposable plates and cups
Roasting Pan with steamer basket or old pie tins(disposable -don’t use for food after dyeing!)
Latex gloves (optional)
Water


Wash & Soak

First you want to wash your silk scarves in warm, soapy water to remove any sizing and oil from your hands.

Heat up about a cup of vinegar to very warm, but not hot temp. (Silk loses its luster if exposed to very high temps.) Soak your scarves in the vinegar for about 20 minutes.

While your scarves are soaking, mix up the dyes according to the directions on the dye container. Take your scarves out of the vinegar and squeeze out the excess liquid.


Folding

How you fold or scrunch your scarf will determine the pattern. For the first scarf, I wanted an “accordion” pattern so I folded it in half lengthwise and beginning at one end, loosely folded it back and forth.

How to dye silk scarves, Fiberartsy.com

Scarf 2, I just wadded and scrunched up in a ball.

How to dye silk scarves, Fiberartsy.com

Place each scarf on a disposable plate. Now comes the fun part…


Adding the Dye

Apply 2-3 colors of dye to each scarf – just enough to saturate the fabric. As you can see, I used a bit too much dye but that’s ok :)

Scarf 1 colors: Sapphire Blue and Hot Fuschia
Scarf 2 colors: Emerald Green, Turquoise and Yellow Sun

How to dye silk scarves, Fiberartsy.com

How to dye silk scarves, Fiberartsy.com


Steaming

Carefully lift your scarf (keeping the shape) and let some of the excess dye drain. Place in plastic bag. (Separate bags if you’re doing more than one)

Now, place the steamer basket (or old pie tins) in the bottom of your roasting pan to keep the bags out of the water. Add about an inch of water and place your plastic bags on top.

Cover the roaster. Turn burner on medium heat and once the water begins to simmer, turn down to low. Simmer for about 1 hour. Take a peek under the lid a couple of times to make sure there is steam. This is needed to set the dye.


How to dye silk scarves, Fiberartsy.com

How to dye silk scarves, Fiberartsy.com

Finishing

All that’s left now is to carefully take the scarf out of the bag – It will be HOT – and rinse in warm water until the water runs clear. If the scarf continues to bleed, which happens sometimes, simply pop it in a clean bag and steam again.


How to dye silk scarves, Fiberartsy.com

These silk scarves make fabulous gifts! Give them for Christmas and Birthdays. They are affordable and fun to make.

Enjoy!

See my other Dyeing Tutorials:

Dyeing Yarn with Kool-Aid

Dye a T-shirt or Yarn with Snow or Ice

Implementing Arts & Craft Tutorials for Kids

$
0
0

It’s best to develop a person’s set of capabilities and aptitude during their formative years. For children, play translates to education. Playgroups give the opportunity for kids to develop their problem-solving and creative skills. Their social talents and emotional intelligence are also nurtured in this time. 

Creating their Masterpieces at Play

As Pablo Picasso said, all children are artists. The challenge is for them to keep that artistic spirit as they grow up. While doing arts and crafts, kids can practice their hand-to-eye coordination skills. They don’t need to worry about colouring inside the lines. Strict rules shouldn’t be applicable during art sessions. Their works don’t need to be perfect as well, though they’ll always be beautiful.

Creating their Masterpieces at Play

Image Source: familysponge.com

Sample Arts & Craft Projects

Despite the gadget trends of today, you can still develop the child’s concentration skills through arts and crafts projects. You’ll simply need to prepare all the needed materials, as well as have the agility and patience to integrate creative concepts in a way your young learners will understand.

Here are some projects you can try out:

• Papier Mache

Translated from French, this concept means “chewed paper”. Using paper-based materials that are “chewed up”, kids can form three-dimensional moulds, and sculpt them into different shapes. Paper moulds can then be turned into airplanes, balloons, cars and even dinosaurs.

Papier Mache

Image Source: channel4.com

Children can choose different hues of paints and watercolour materials to make their works more interesting. You will simply need to prepare newspapers, flour, thick water-based glue and child-friendly paint. You can prepare your paper mixture before beginning the class. Students can then practice their moulding skills and accuracy in estimating proportions of their target figures. 

• Card Making

Bring out the literary side in your students as they make cards for their loved ones. These don’t need to be done only during Valentines’ Day. Children can learn the value of thoughtfulness while writing their cards for friends with birthdays or whenever they want to make someone feel special.

card making

Image Source: redtedart.com

You can stock up on card making paper supplies, colourful trinkets, interesting pictures and glitter pens in the classroom. Depending on the size of your class, each student gets to write a card for a loved one. They’ll be entitled to draft a card just to brighten up someone’s day.

• Kiddie Recipes

Now is the time when kids are finally allowed to play with their food. Ice cream sprinkles and veggie pastas would be interesting for the students to get their hands on. They’re easy to prepare and if you’re teaching your students how to identify different types of colours and textures, sprinkles and pasta toppings make great references.

For ice cream sprinkles, you can prepare the main ingredient: chocolate or vanilla ice cream. Toppings can be differently-shaped marshmallows, lollies and chocolate bits.

kiddie recipe

Image Source: epicurious.com

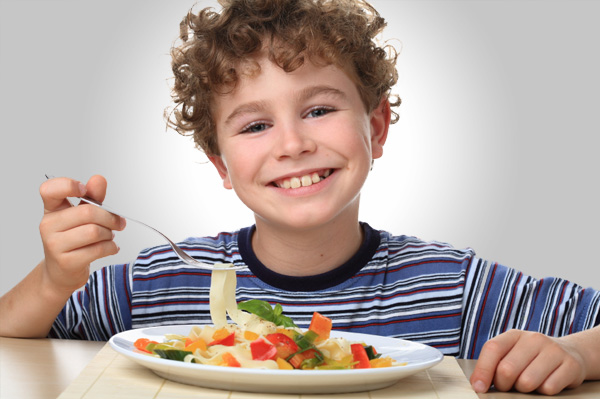
Veggie pastas should be combined with melted cheese. While most kids are cheese fans, not so many like vegetables and healthy veggies can be disguised by the dairy-based sauce.

veggie pasta

Image Source: sheknows.com

Positive learning experiences are what count when it comes to teaching children. Arts and crafts are just a few of the activities which can enhance a child’s life and learning skills. Eventually, they’ll apply the dexterity of their hands in more practical and crucial situations.

A Mother’s Undying Love Lives On

$
0
0

A mother’s undying love lives on through future generations.
Mother photo 1943

My mother is holding me while surrounded by my loving dad, sister and grandfather.  Naturally I don’t remember that day, but I’ll always remember the love she generously gave me and everyone else.

As an only child, she was “over protected” from ever learning how to ride a bicycle, roller skate or even whistle.

She instilled in me her passion for learning how to create things, rather than buy a cheaply made version.

Now as a grandmother, her influencing love for creativity lives on through me to the great-grandchildren she never met.

A school assignment for my grandchildren was to write stories in their journals.

My daughter shared my grandson’s journal entry on the subject, “Tell about an interesting person you have met.”

Nate wrote, “The interesting person I have met is my grama.  She makes cool things like hovercrafts.  The best thing I think she made is the hovercraft.”

The drawing shows a smiling Nate with a hovercraft, we made at Camp Grandma.

Journal Entry - Mother

A used CD is super glued to the top portion of a plastic bottle.  After blowing up the balloon, it is attached to the bottle’s stopper.

The air from the balloon makes the hovercraft float across the table.

Hovercraft with Mother

What cool crafts will your kids  remember creating with you?

Free Tutorial on Making a Wire Wrapped Flower Ear Cuff Earring

$
0
0

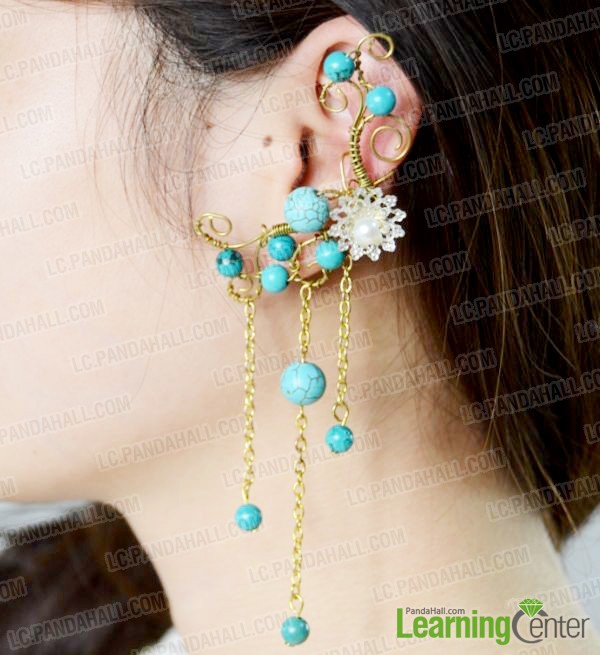
Wire wrapping and beading turquoise beads are involved in the design of wire ear cuff earring. No matter whether you ear have been pierced, you can wear the flower ear cuff earring. Let’s start the tutorial about making wire wrapped ear cuff earrings and make a beautiful ear cuff earring for you.

Necessaries for making flower ear cuff earring:

0.8mm Copper Wires
0.5mm Copper Wires
8mm Round Turquoise Beads
4mm Round Turquoise Beads
White Acrylic Beads
Mixed Bead Cap
Head Pins
Eye Pins
Golden Chains
Wire Cutter Plier
Round Nose Plier
Flat Plier

How to make ear cuff earrings?

Step1: Make the basic frame of the flower ear cuff earring

1st, cut three 15cm 0.8mm copper wires and twist them into the shape as picture shows;
2nd, cut 50cm 0.5mmcopper wire and slide a pearl bead onto the middle of it;
3rd, thread both working ends through three bead caps according to size from small to large, and then pull them tight;
4th, part the two wires and fix the white flower to the three vines by wire wrapping, be sure that the three vines placed in order as shown.

make the basic frame of the flower ear cuff earring

Step2: Make the bead dangle chains

1st, cut three 4cm golden chains and a 1.5cm golden chain;
2nd, slide a headpin onto a 4mm turquoise bead and make a loop, then cut the extra wire;
3rd, repeat the 2nd to make other two beads findings;
4th, string an eyepin onto the 8mm turquoise bead and make a loop, then cut the extra wire;
5th, attach the three 4mm beads to the end of the three 4cm chains separately;
6th, link the 1.5cm chains to one 4cm chains by the 8mm bead finding as picture shows.

make the bead dangle chains of the flower ear cuff earring

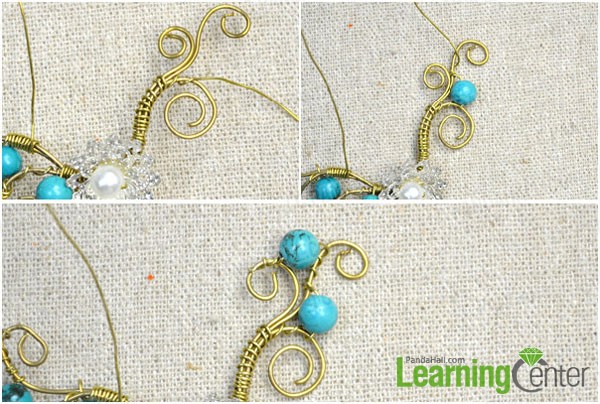
Step3: Wire wrapping the left part of the flower ear cuff

1st, thread the left working end through the first hole of one 4cm chains, then continue to wrap around the three vines for 5 circles;
2nd, turn the wrapping wire to the lowest vine and roughly wrap around it for 7circles, then thread the wire though the first hole of the longest chains and go on wrapping around the vine for 2circles;
3rd, continue slide a small bead onto the wrapping wire and twine the wire around the three vines, finally cut the remaining wires;
4th, cut 5cm 0.5mm copper wire and wind it around the middle vine as picture shows, and then string the wire cross the hole of the other 4cm chains and continue to twine the wire around the vine for 3 circles, finally cut the extra wire;
5th, cut 20cm copper wire and twine it around the top vine as picture shows;
6th, slide a turquoise bead onto the wrapping wire and connect the top and middle vines by wrapping;
7th, repeat the 6th step twice to link the middle and the lowest vines, as well as the lowest vine and other two vines as shown, and finally bind the top and middle vines for 1cm.

wire wrapping the left part of the flower ear cuff

Step4: Wire wrapping the right part of the flower ear cuff

1st, wire wrap the right wire around the three vines for 1.5cm, and then turn it to twist around the lowest vine as shown;
2nd, slide a small turquoise bead and continue to wind around the middle vine for 3circles;
3rd, string a small bead again and twine it around the top vine for several circles, finally cut the extra wires.

wire wrapping the right part of the flower ear cuff

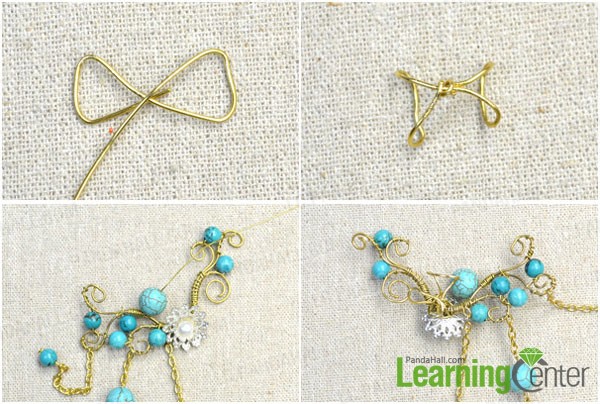
Step5: Finish the wire flower ear cuff earring

1st, cut 10cm 0.8mmcopper wire and make it into the shape as picture shows;
2nd, bind the middle and cut the rest of the wires, and then bend both ends into the shape as shown;
3rd, slide a big turquoise bead onto the left wire and twist the wire around the bottom of the flower for 1 circle;
4th, attach the ear cuff to the embellishment through wrapping, and then cut the extra wires.

finish the wire flower ear cuff earring

Awesome!


the completed flower ear cuff earring

A beautiful flower ear cuff earring has been done. Have you got the methods after reading the tutorial about wire wrapped ear cuff? Have a try and show your designs.

Viewing all 1382 articles
Browse latest View live